


vendor-unknown
Turn On/Off led via web Server using NodeMCU ESP8266-12E Board - KT574
Turn On/Off led via web Server using NodeMCU ESP8266-12E Board - KT574
SKU:KT574
Low stock: 7 left
Couldn't load pickup availability
- For Bulk Order Click Here
- Need Customer Support?
- Free Delivery Above 999/-
Note: In case you receive a damaged or faulty product, please return it in the original box with all foam and packaging. Returns will not be accepted if further damage occurs due to improper packing.
If you order a product that is currently in Preorder, and the price of that item increases in the future, you will be required to pay the difference in price.
For refund/return/replacement, call us at +91 95995 94520 or email us at support@rees52.com
Delivery Time
Delivery Time
- Delivery time with the Express Shipping option is 2-3 working days, and with the Standard Shipping option is 5-6 working days. It varies based on location, reliant on courier services.
- Delivery time if the order item is on Preorder Status is 15-20 working days.
COD (Cash on Delivery)
COD (Cash on Delivery)
- For COD you have to pay extra charges of Rs 350/- before the shipment. (We will share the company QR Code, UPI ID or Account details for the same)
KIT INCLUDES
- NodeMCU ESP8266-12E NodeMcu Board -1
- Led 5mm -1
- ESP8266 Cp2102 USB cable – 1
- 830 pt. breadboard -1
- Jumper wires (Male to Male) -1
Introduction
In this project, we have used to design an IOT based LED ON-OFF with webpage using Node MCU.
HARDWARE REQUIRED
- NodeMCU ESP8266-12E NodeMcu Board -1
- Led 5mm -1
- ESP8266 Cp2102 USB cable – 1
- 830 pt. breadboard -1
- Jumper wires (Male to Male) -1
SOFTWARE REQUIRED
Arduino IDE 1.8.10 (programmable platform for Arduino)
Click To Download: https://www.arduino.cc/en/Main/Software

SPECIFICATIONS
NodeMCU ESP8266 CP2102 NodeMCU WIFI Serial Wireless Module
- ESP8266 CP2102 NodeMCU LUA ESP-12E WIFI Serial Wireless Module
- Built-in Micro-USB, with flash and reset switches, easy to program
- Full I/O port and Wireless 802.11 supported, direct download no need to reset
- Arduino compatible works great with the latest Arduino IDE/Mongoose IoT/Micro python

Led

CIRCUIT CONNECTION
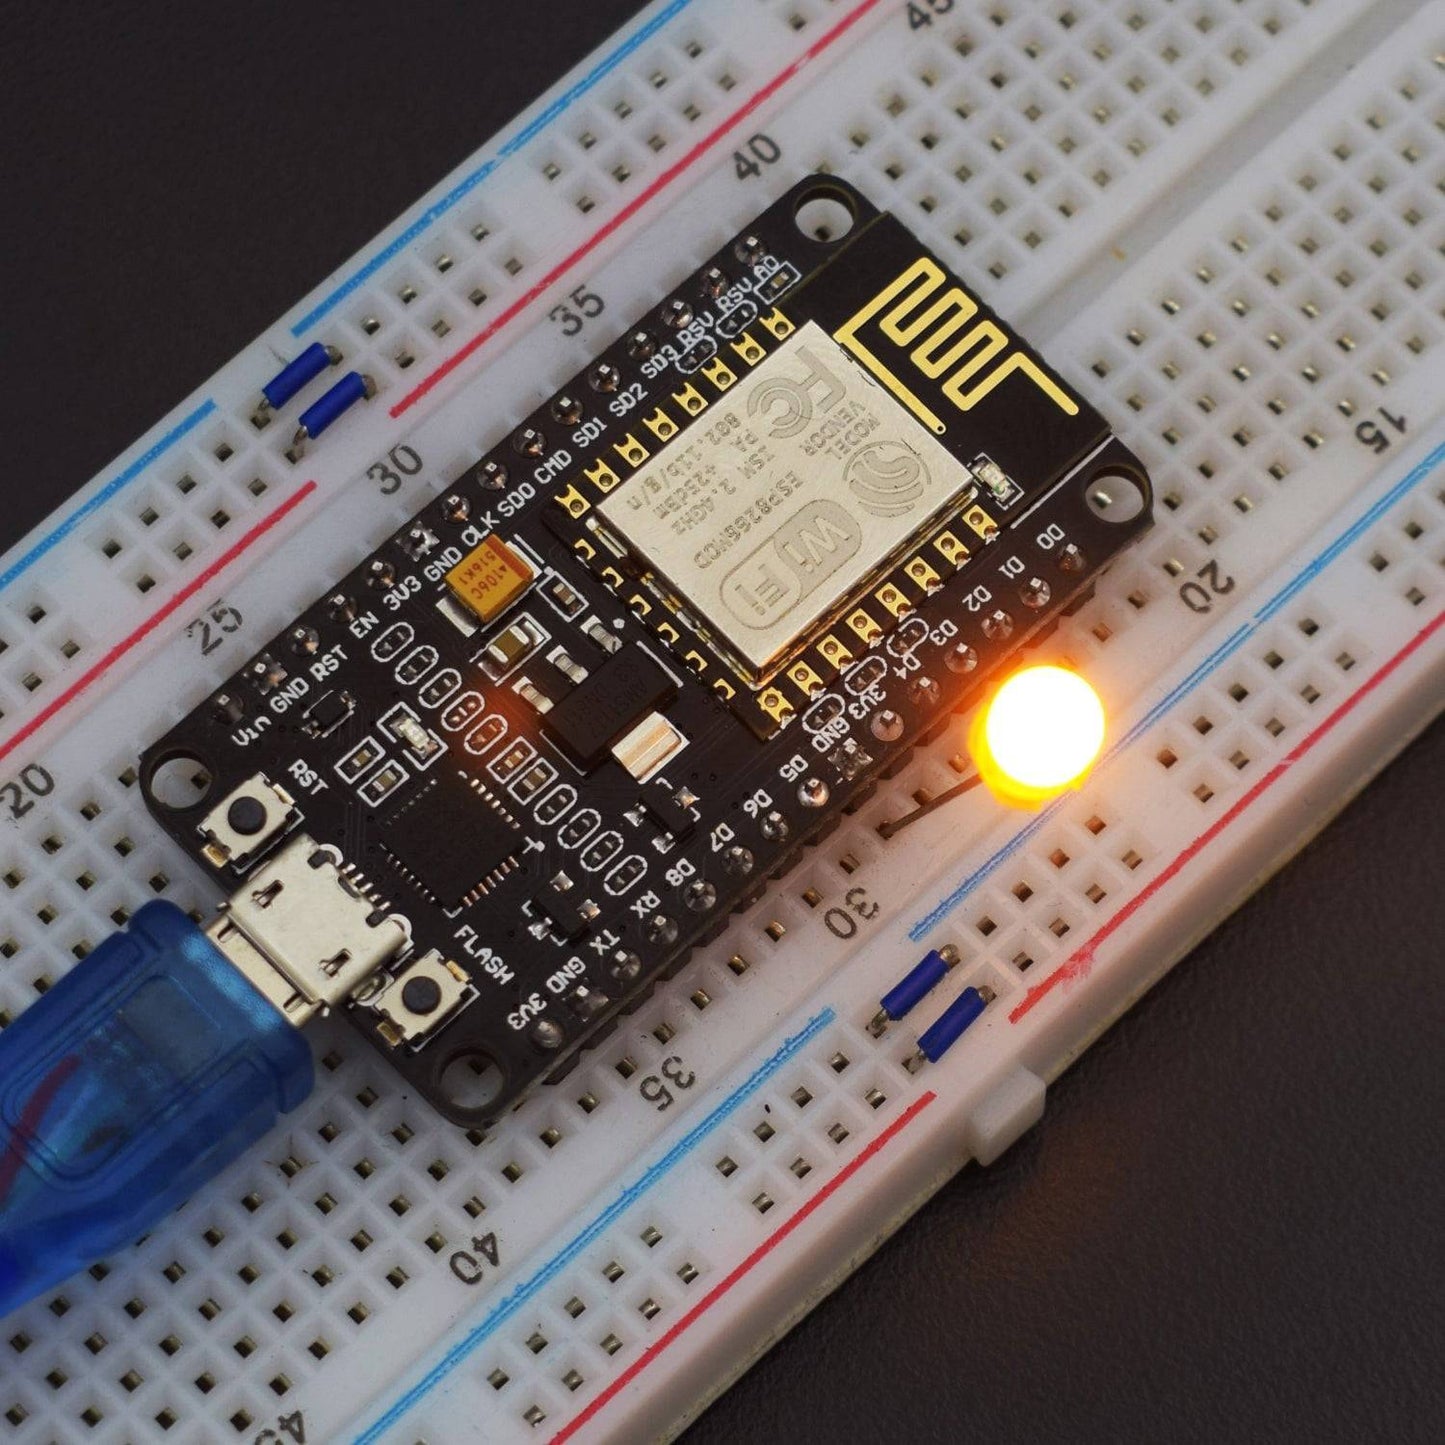
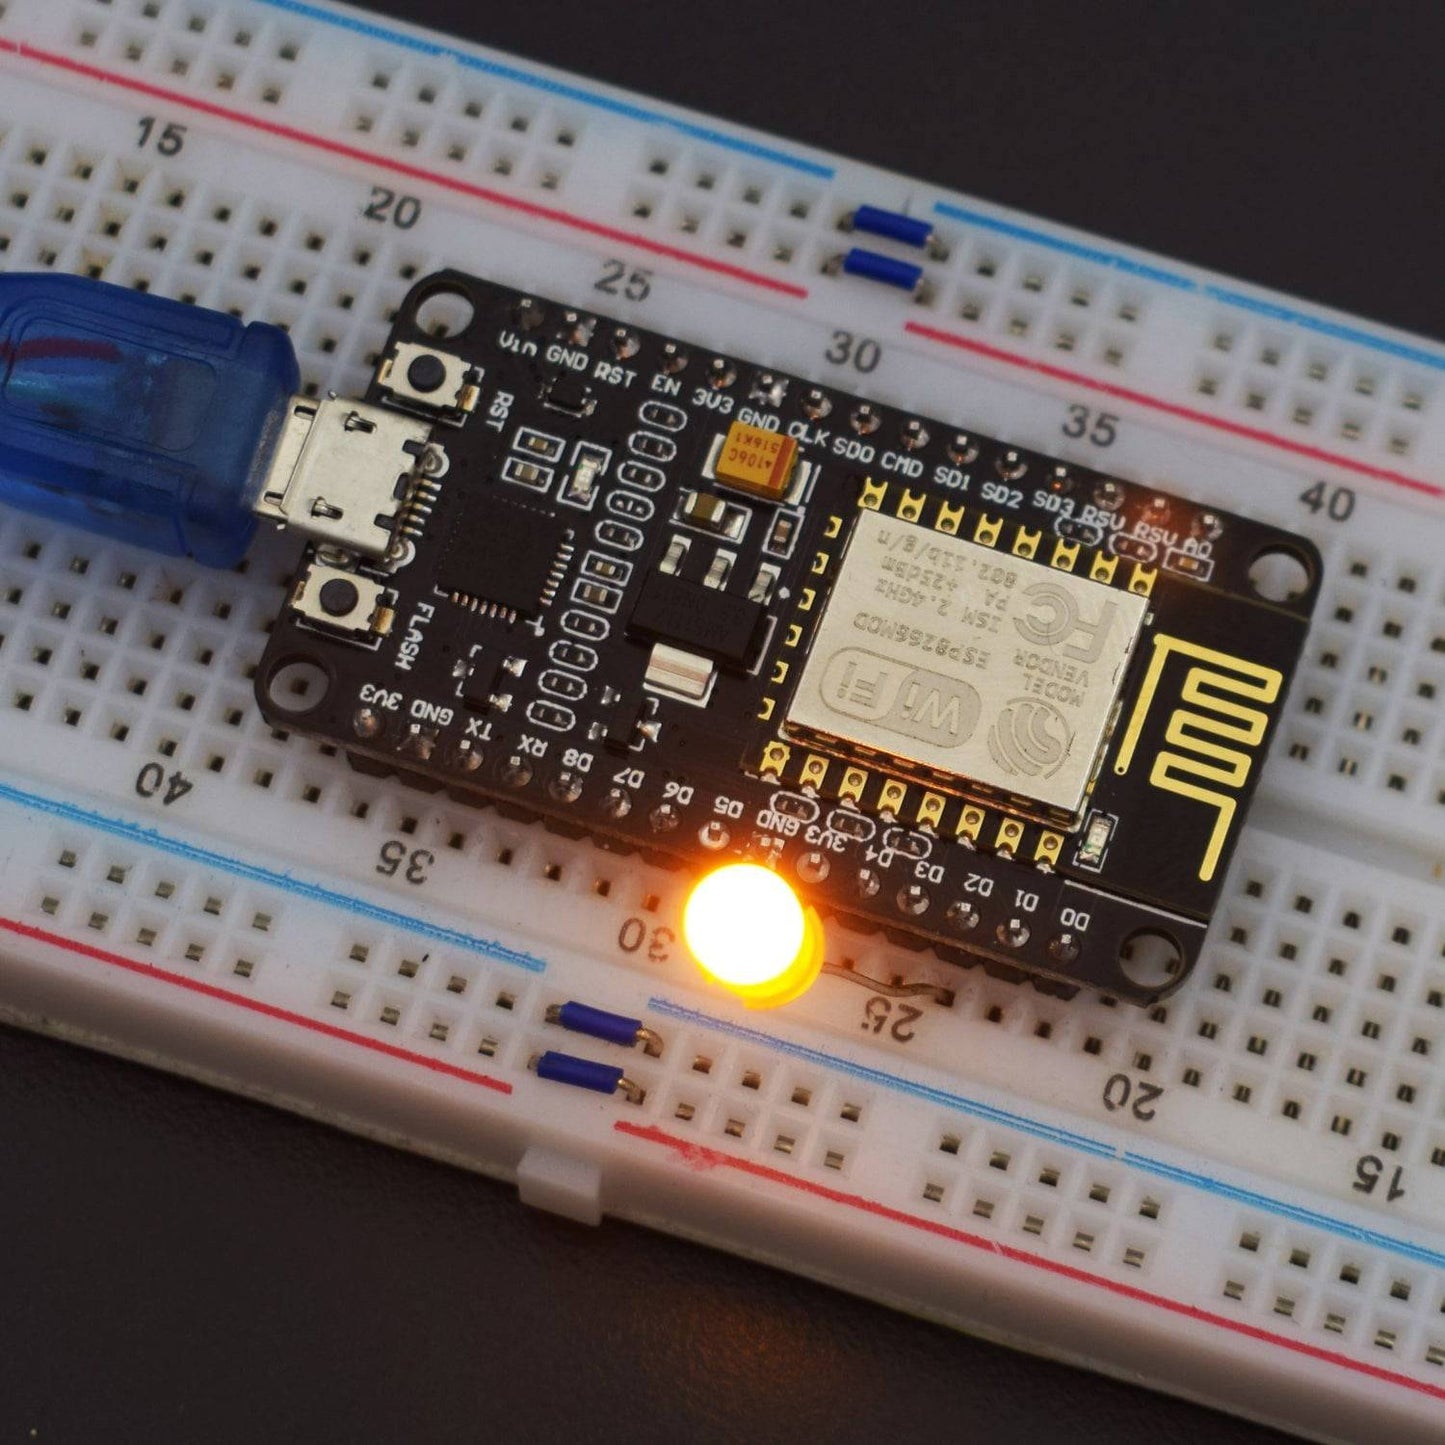
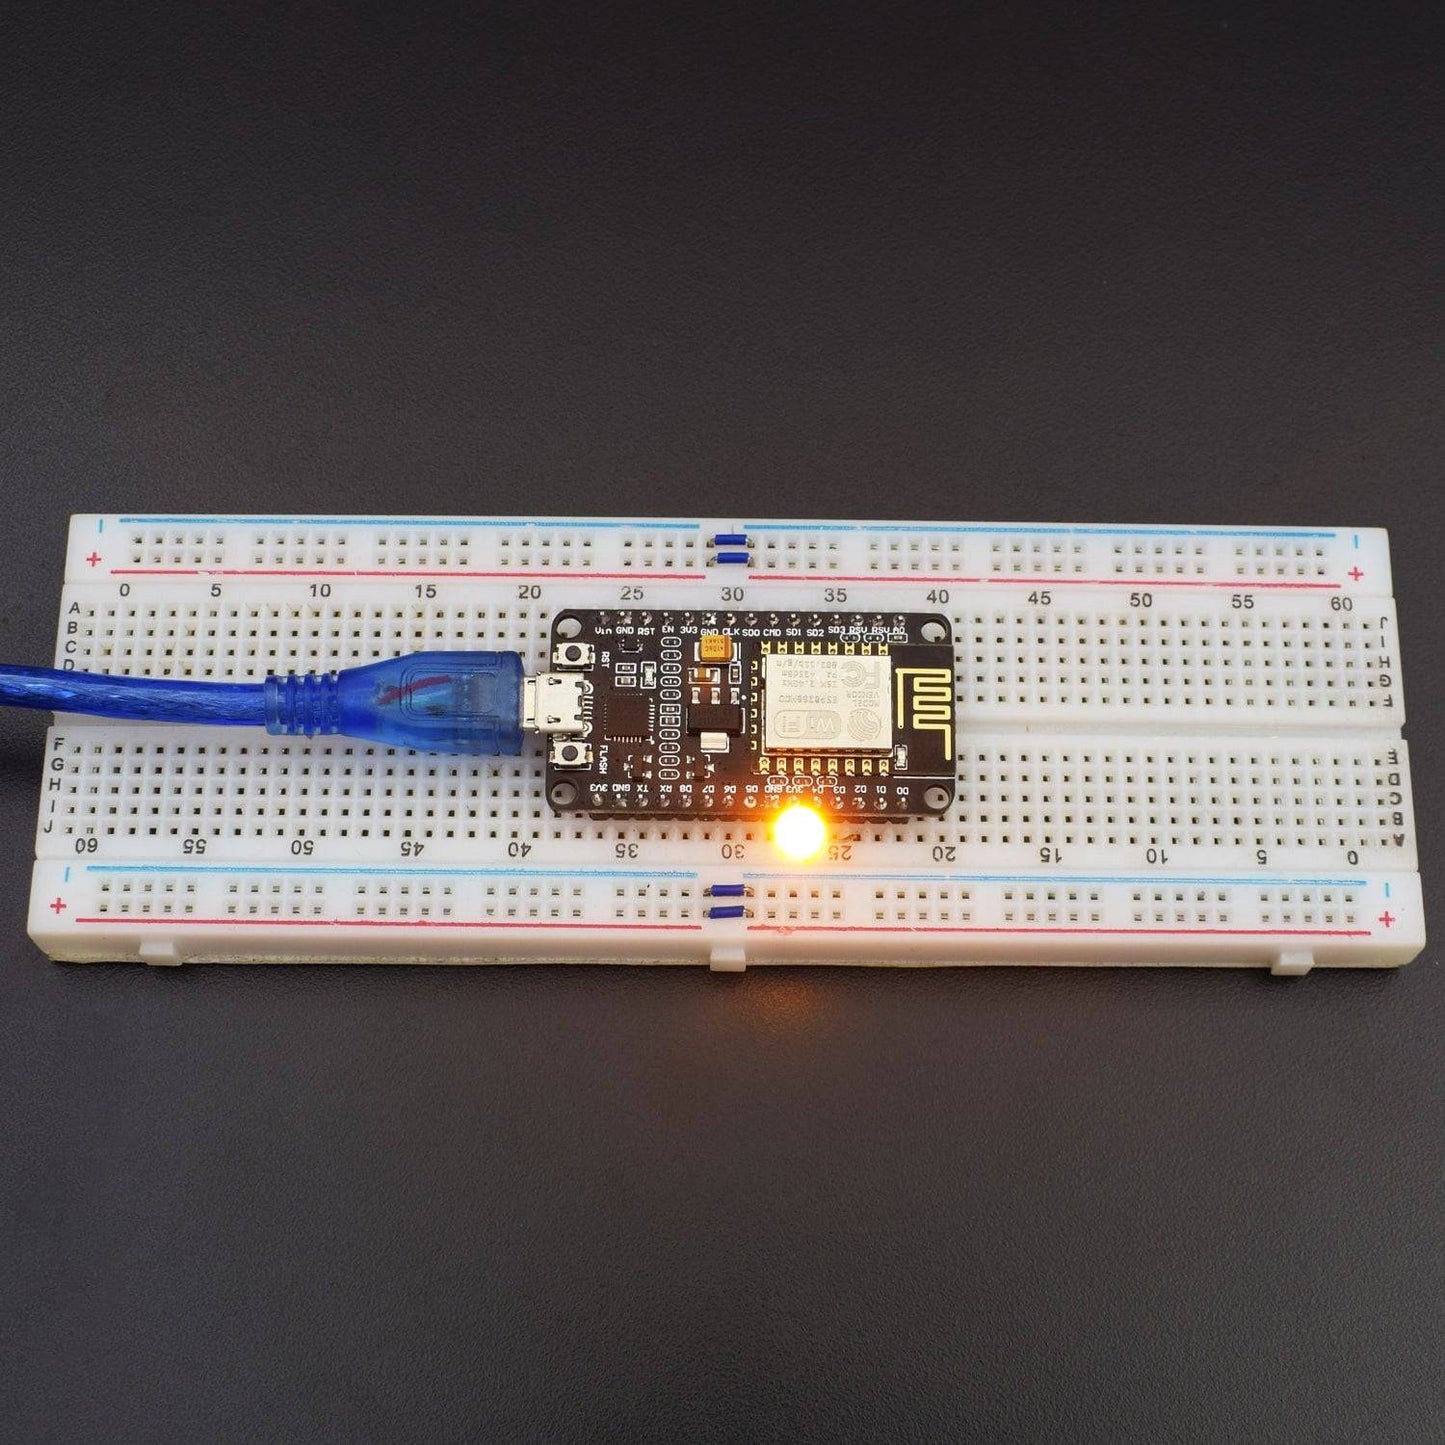
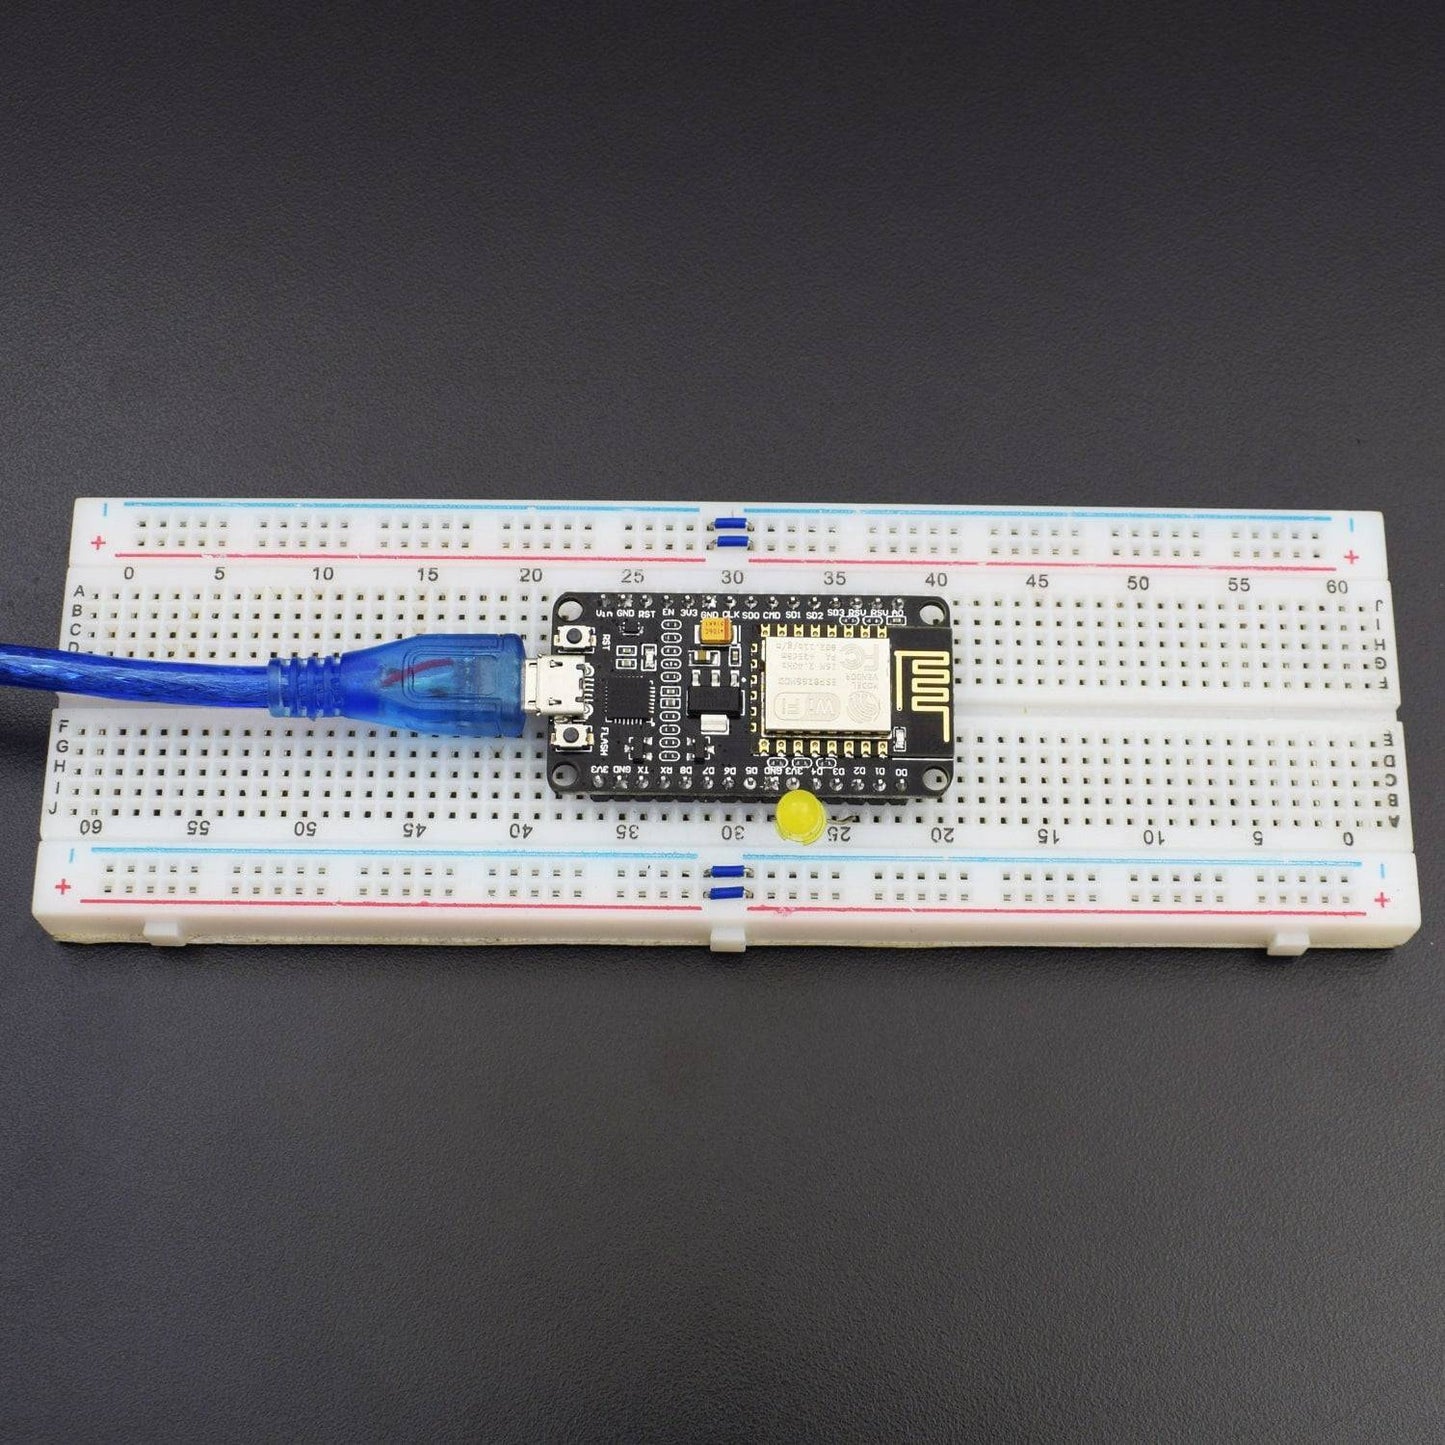
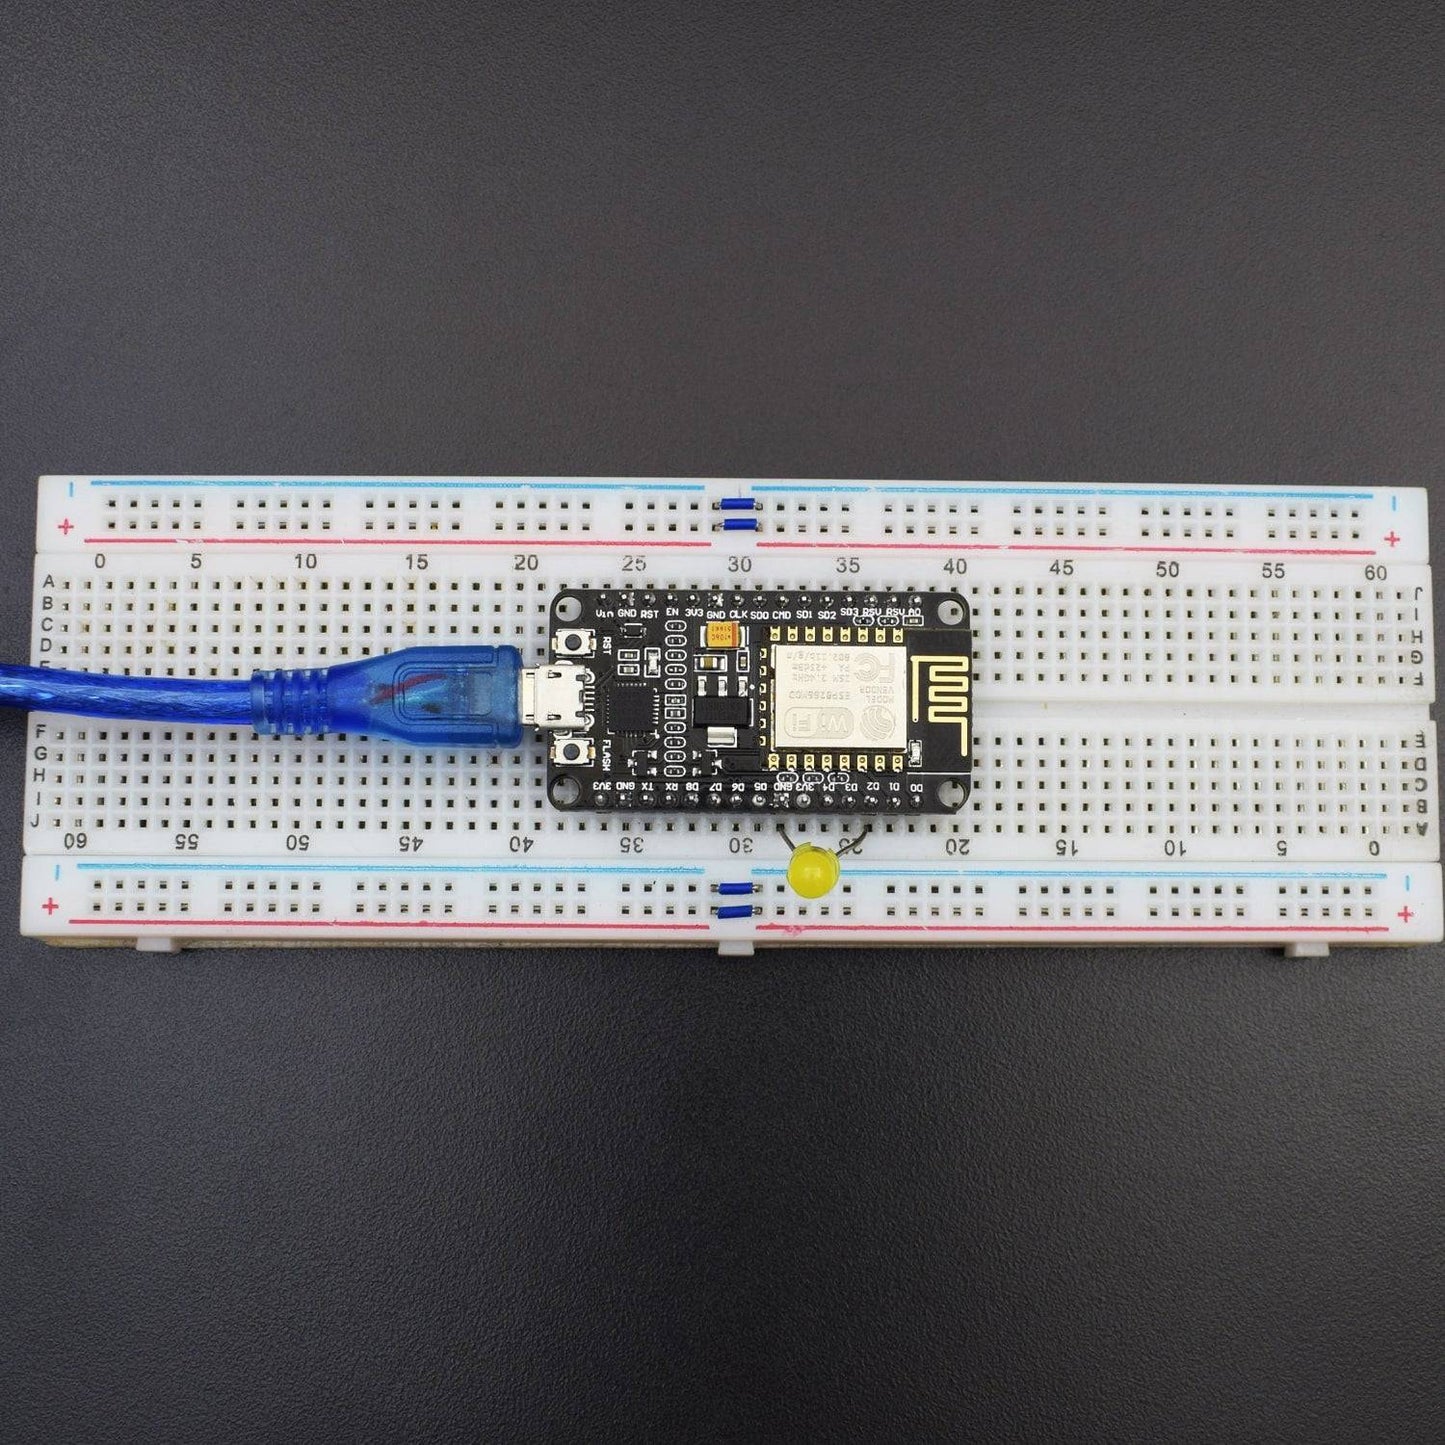
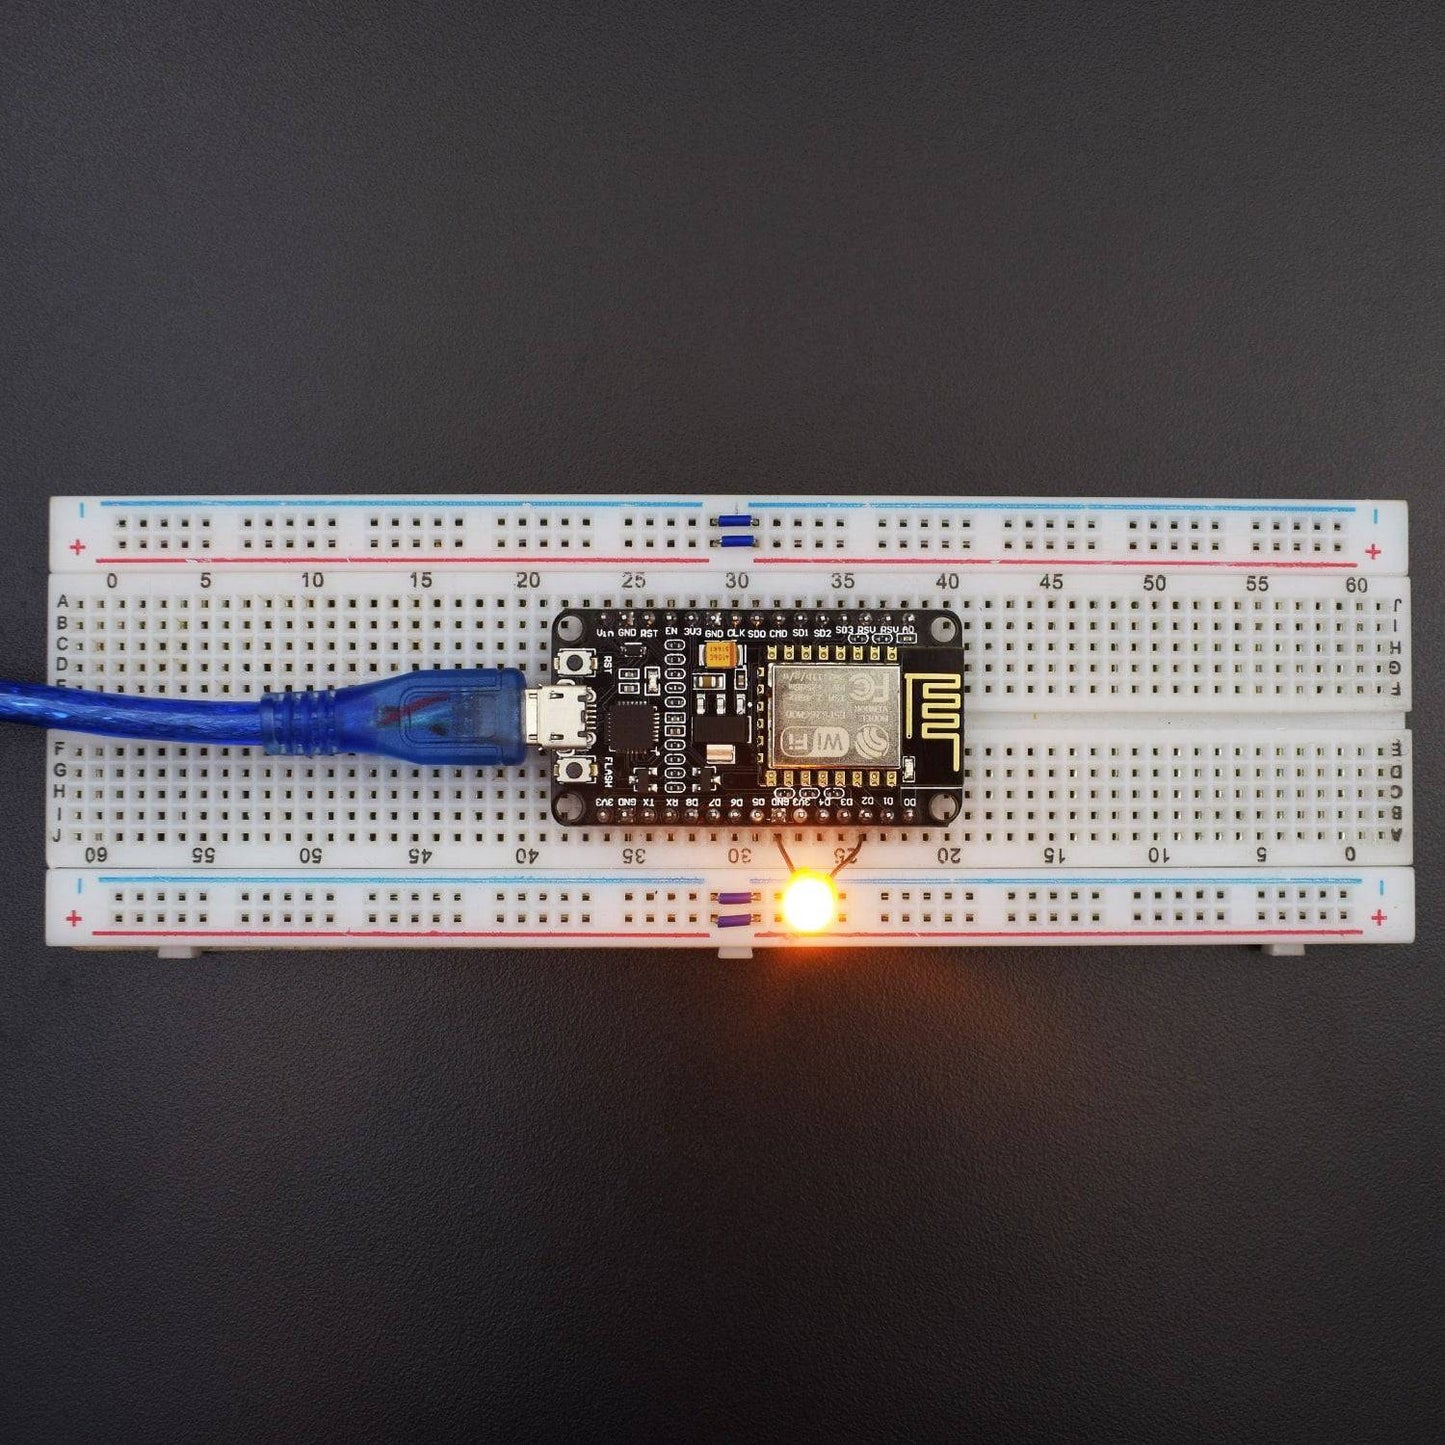
Attach the NodeMCU board with the breadboard.
Connect D2 (GPIO4) pin of NodeMcu to the positive leg of led and the GND leg of led to the GND pin of NodeMCU Board.

CODE
Click to see the code
https://drive.google.com/open?id=1u_XBqQhuvuaMfOM04IPcwLWGpFa-xZN3
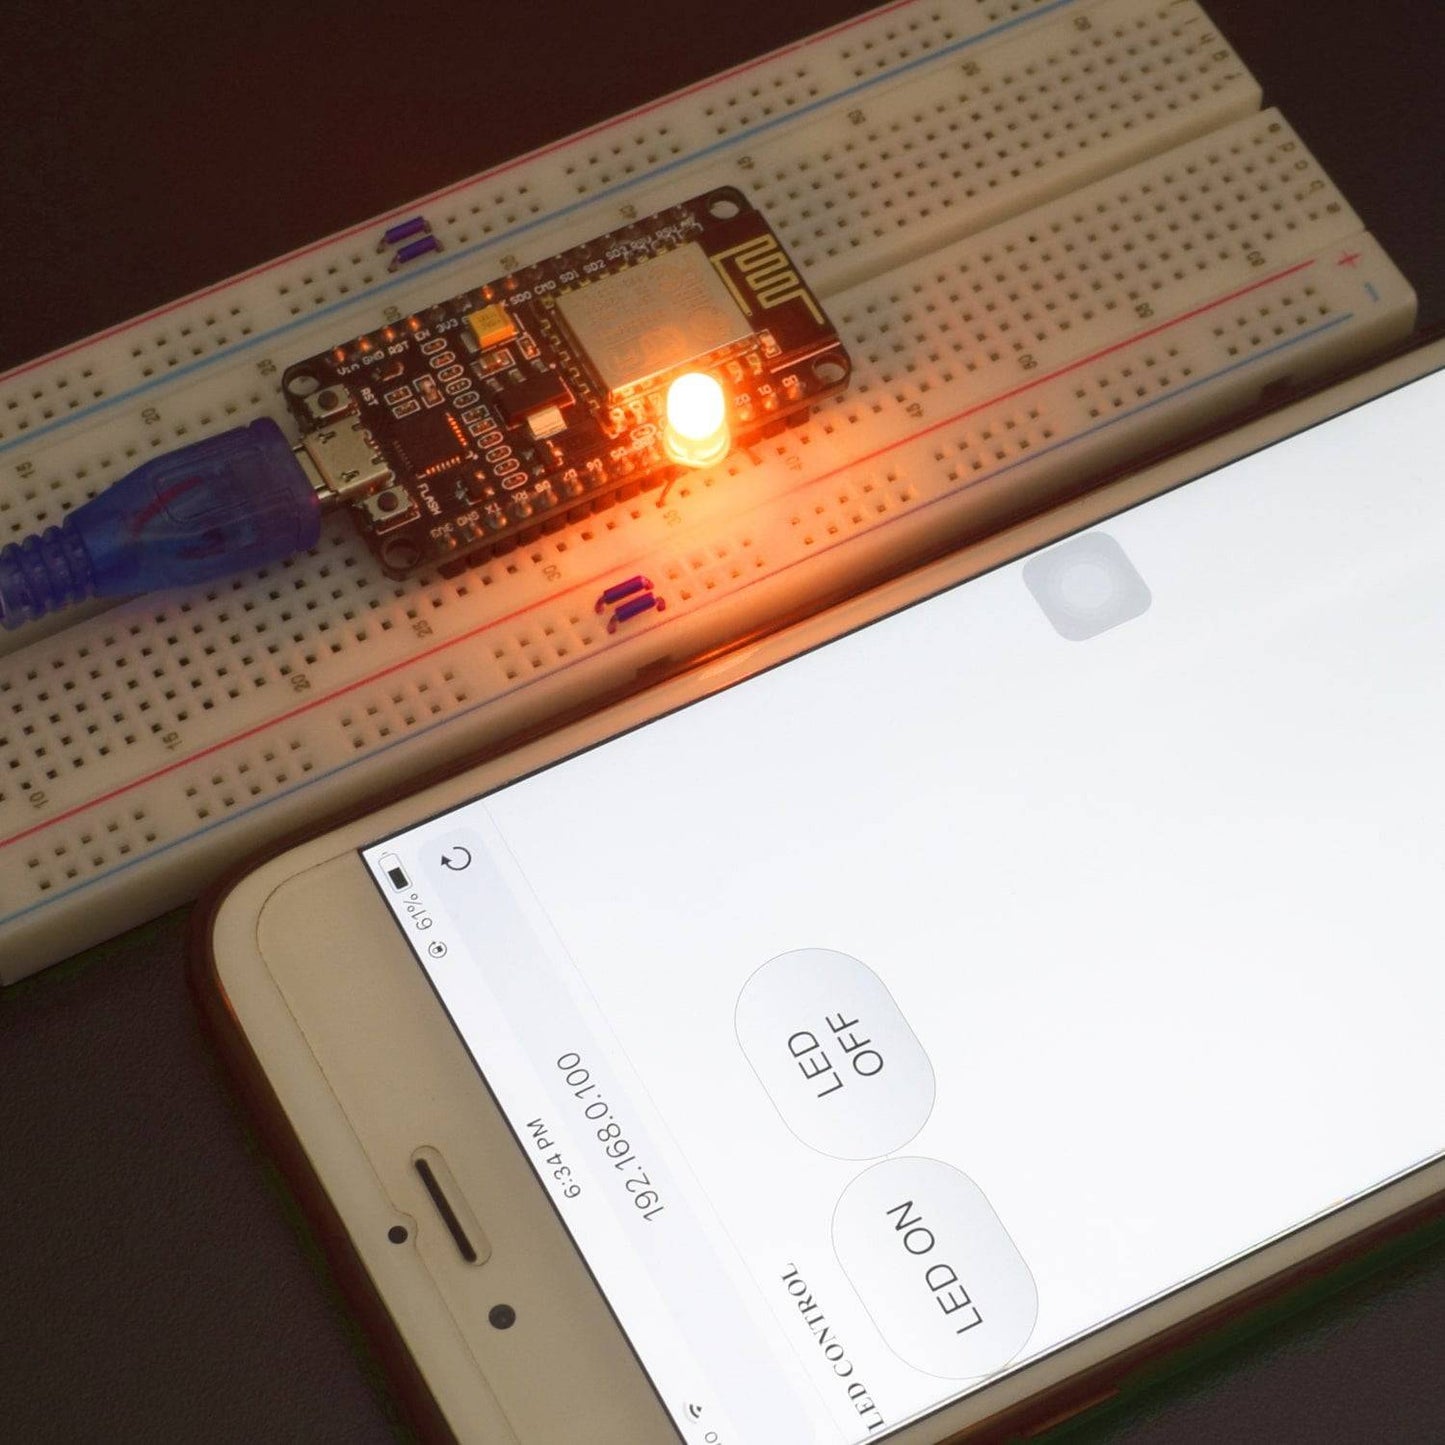
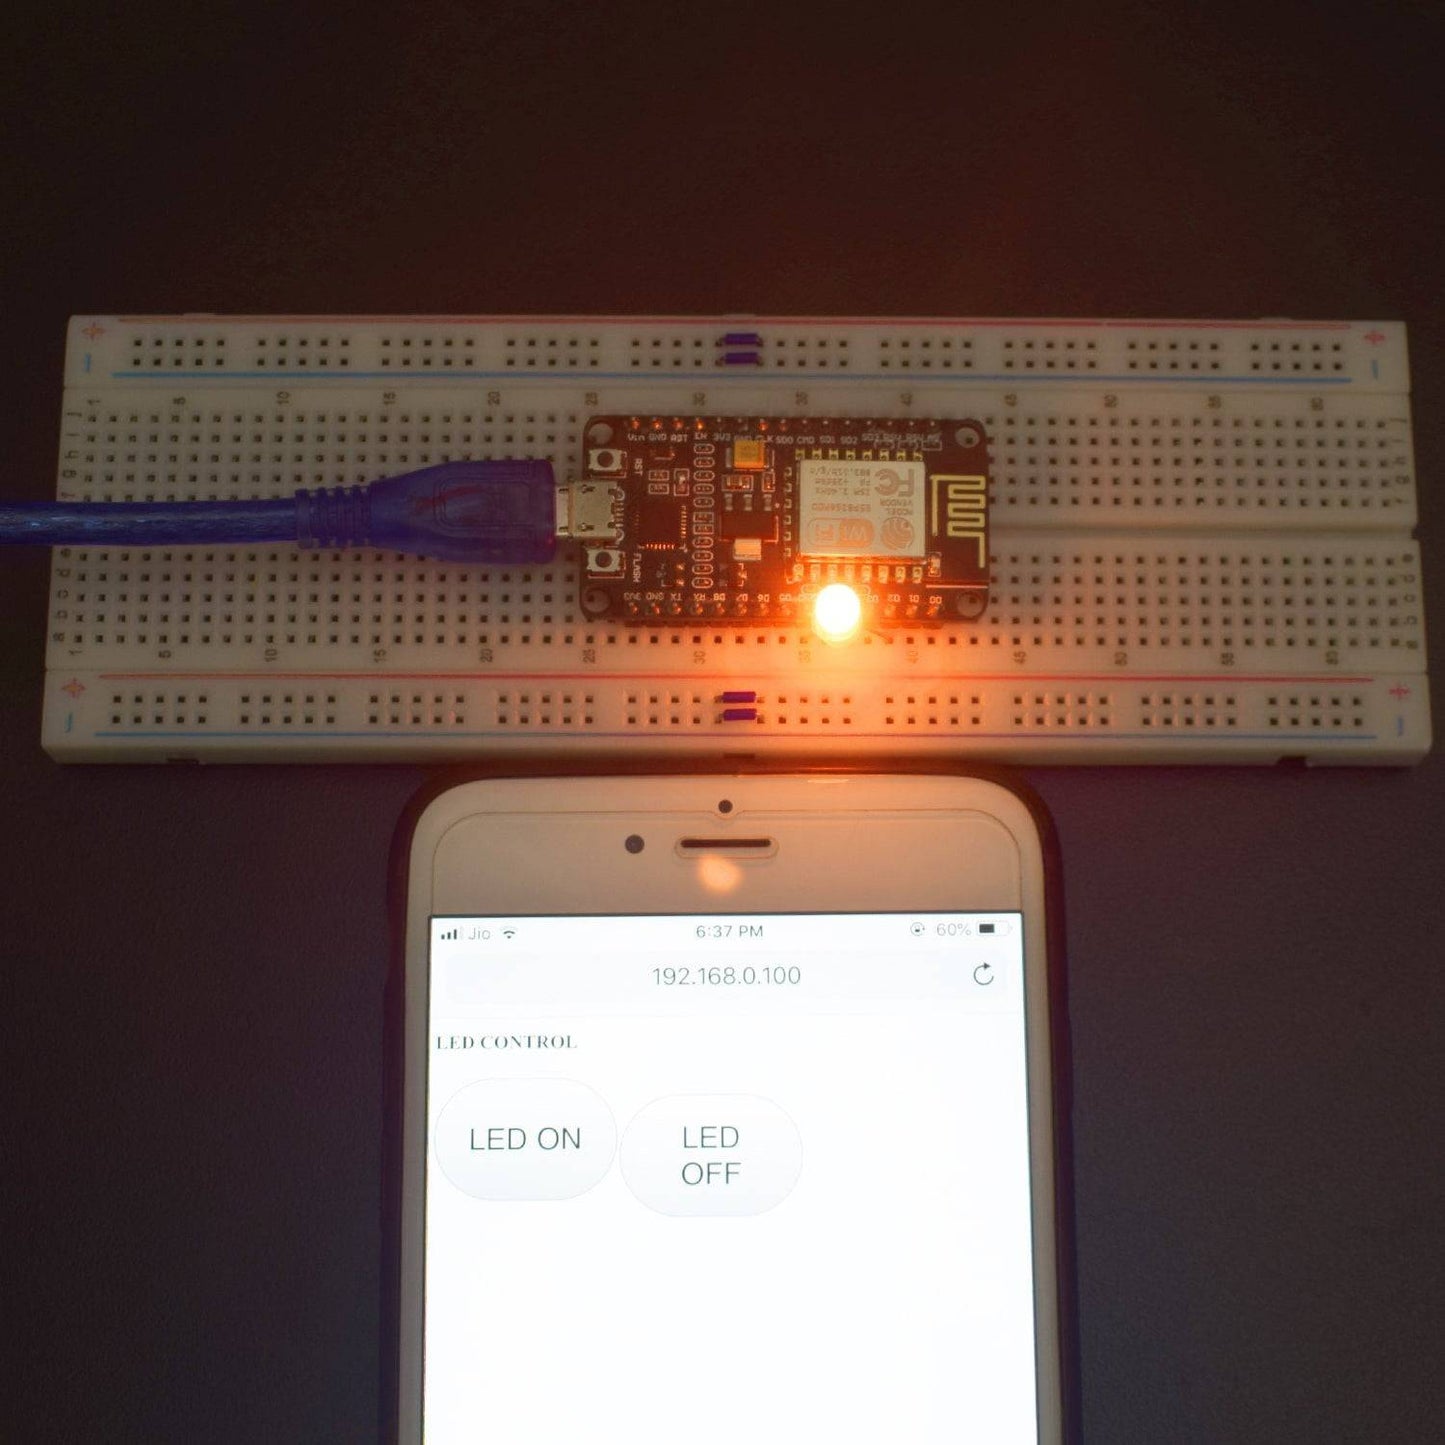
WORKING AND OUTPUT
Welcome to the Node MCU Based project.
In this project, we will blink a led using NodeMCU 8266-12E Wi-Fi Board. We can blink an inbuilt internal led but we are blinking an external led. We used the Arduino IDE to blink the on-board LED, the blue led in the board was used to signal the execution of a particular procedure.
- To connect with webpage. First, you need to upload the sketch and go to serial monitor you get the IP address.
- Copy the IP address and go and paste to browser.


Click to watch the tutorial
For more tutorials subscribe our channel REES52 on YouTube
https://www.youtube.com/channel/UCKuJ1KCjJGat7PrdAcWtu5g