


Raspberry Pi
Raspberry Pi 4 Case Fan Pi 4 Case Fan RPi 4 Case Fan Protect Your Raspberry Pi 4 From Overheating With A Case Fan - RS7172
Raspberry Pi 4 Case Fan Pi 4 Case Fan RPi 4 Case Fan Protect Your Raspberry Pi 4 From Overheating With A Case Fan - RS7172
SKU:RS7172
In stock
Couldn't load pickup availability
- For Bulk Order Click Here
- Need Customer Support?
- Free Delivery Above 999/-
Note: In case you receive a damaged or faulty product, please return it in the original box with all foam and packaging. Returns will not be accepted if further damage occurs due to improper packing.
If you order a product that is currently in Preorder, and the price of that item increases in the future, you will be required to pay the difference in price.
For refund/return/replacement, call us at +91 95995 94520 or email us at support@rees52.com
Delivery Time
Delivery Time
- Delivery time with the Express Shipping option is 2-3 working days, and with the Standard Shipping option is 5-6 working days. It varies based on location, reliant on courier services.
- Delivery time if the order item is on Preorder Status is 15-20 working days.
COD (Cash on Delivery)
COD (Cash on Delivery)
- For COD you have to pay extra charges of Rs 350/- before the shipment. (We will share the company QR Code, UPI ID or Account details for the same)


Description:
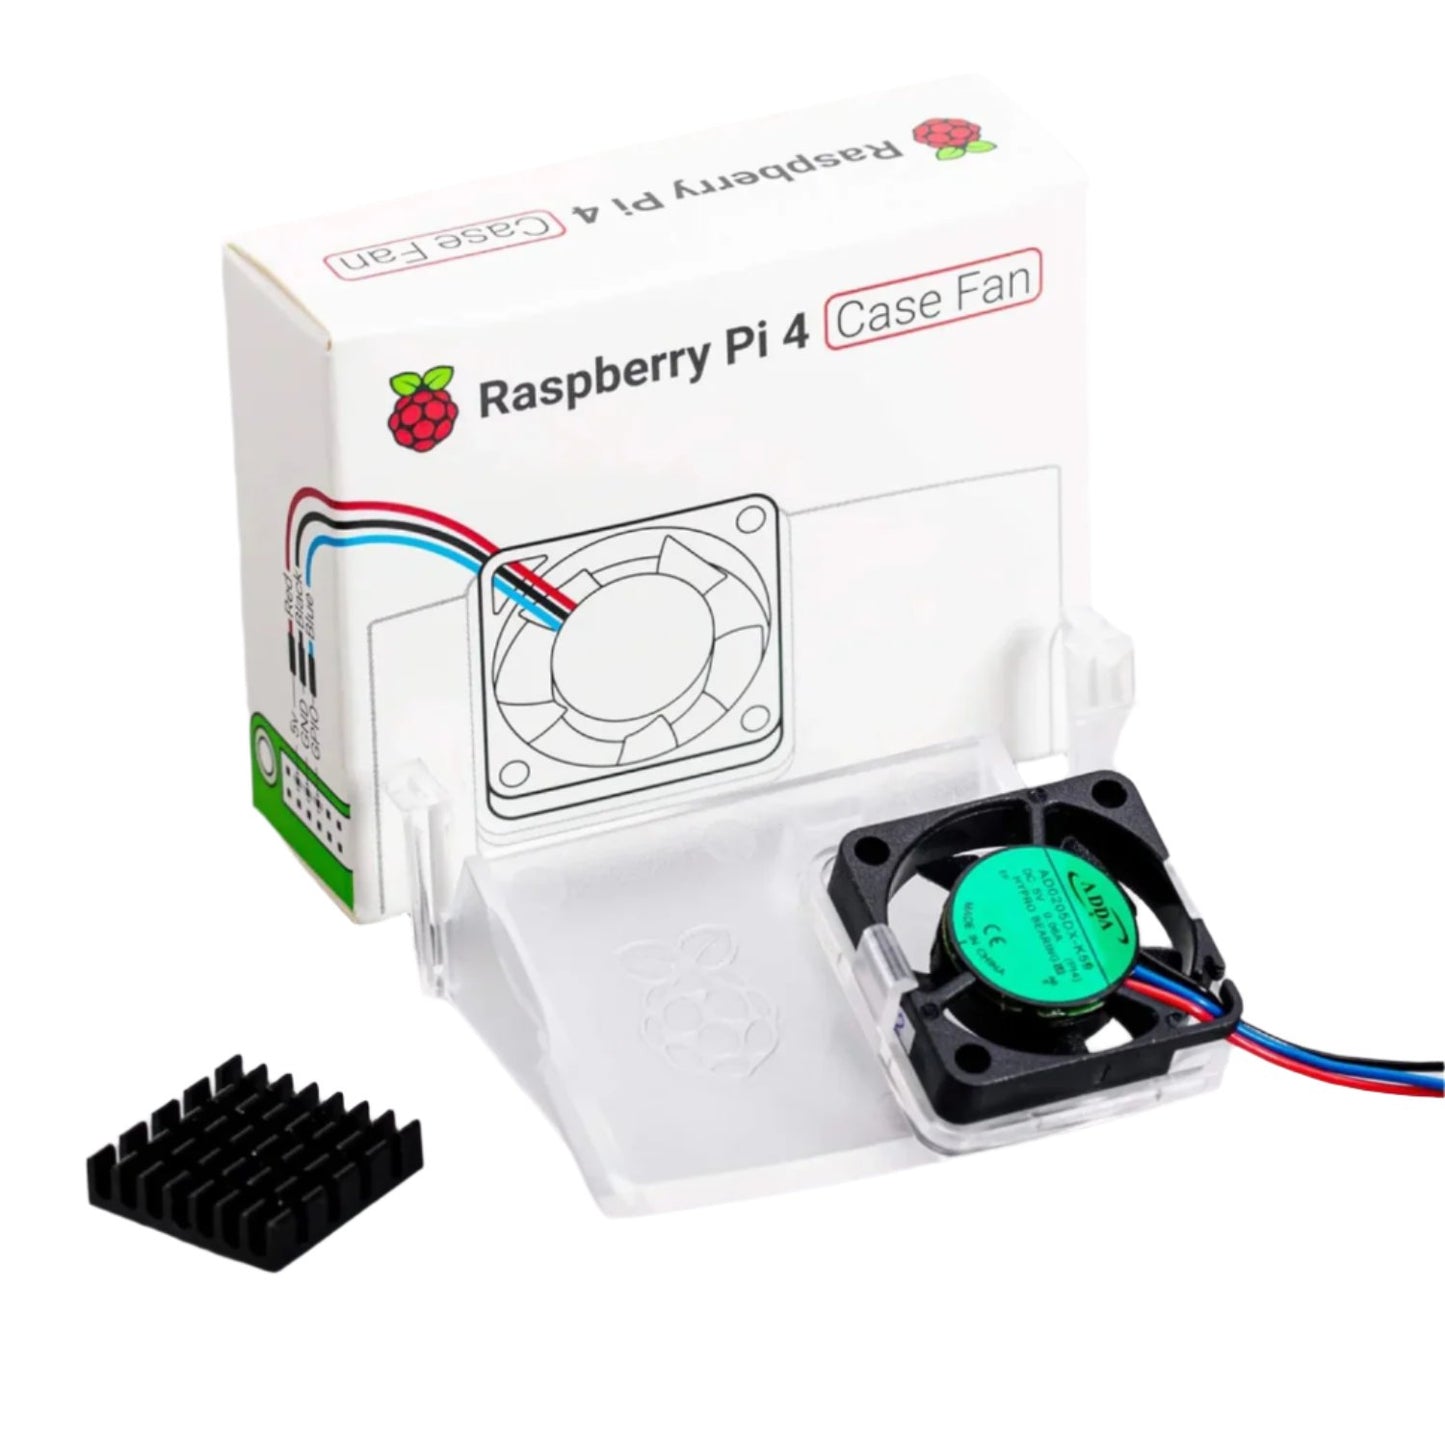
This Raspberry Pi 4 Case Fan is an official Raspberry Pi accessory, engineered specifically to integrate seamlessly with the official Raspberry Pi 4 Case.
Ideal for overclockers and power users, this fan ensures your Raspberry Pi 4 stays cool even under heavy load. It effectively prevents CPU throttling, keeping your Pi 4 running at tip-top performance consistently.
This fan is the perfect add-on for anyone pushing their Pi 4 to its limits, whether it's for gaming, a media centre, or other intensive projects. For smart cooling, the fan is also temperature-controlled via PWM (Pulse-width Modulation), with a user-selectable GPIO pin.
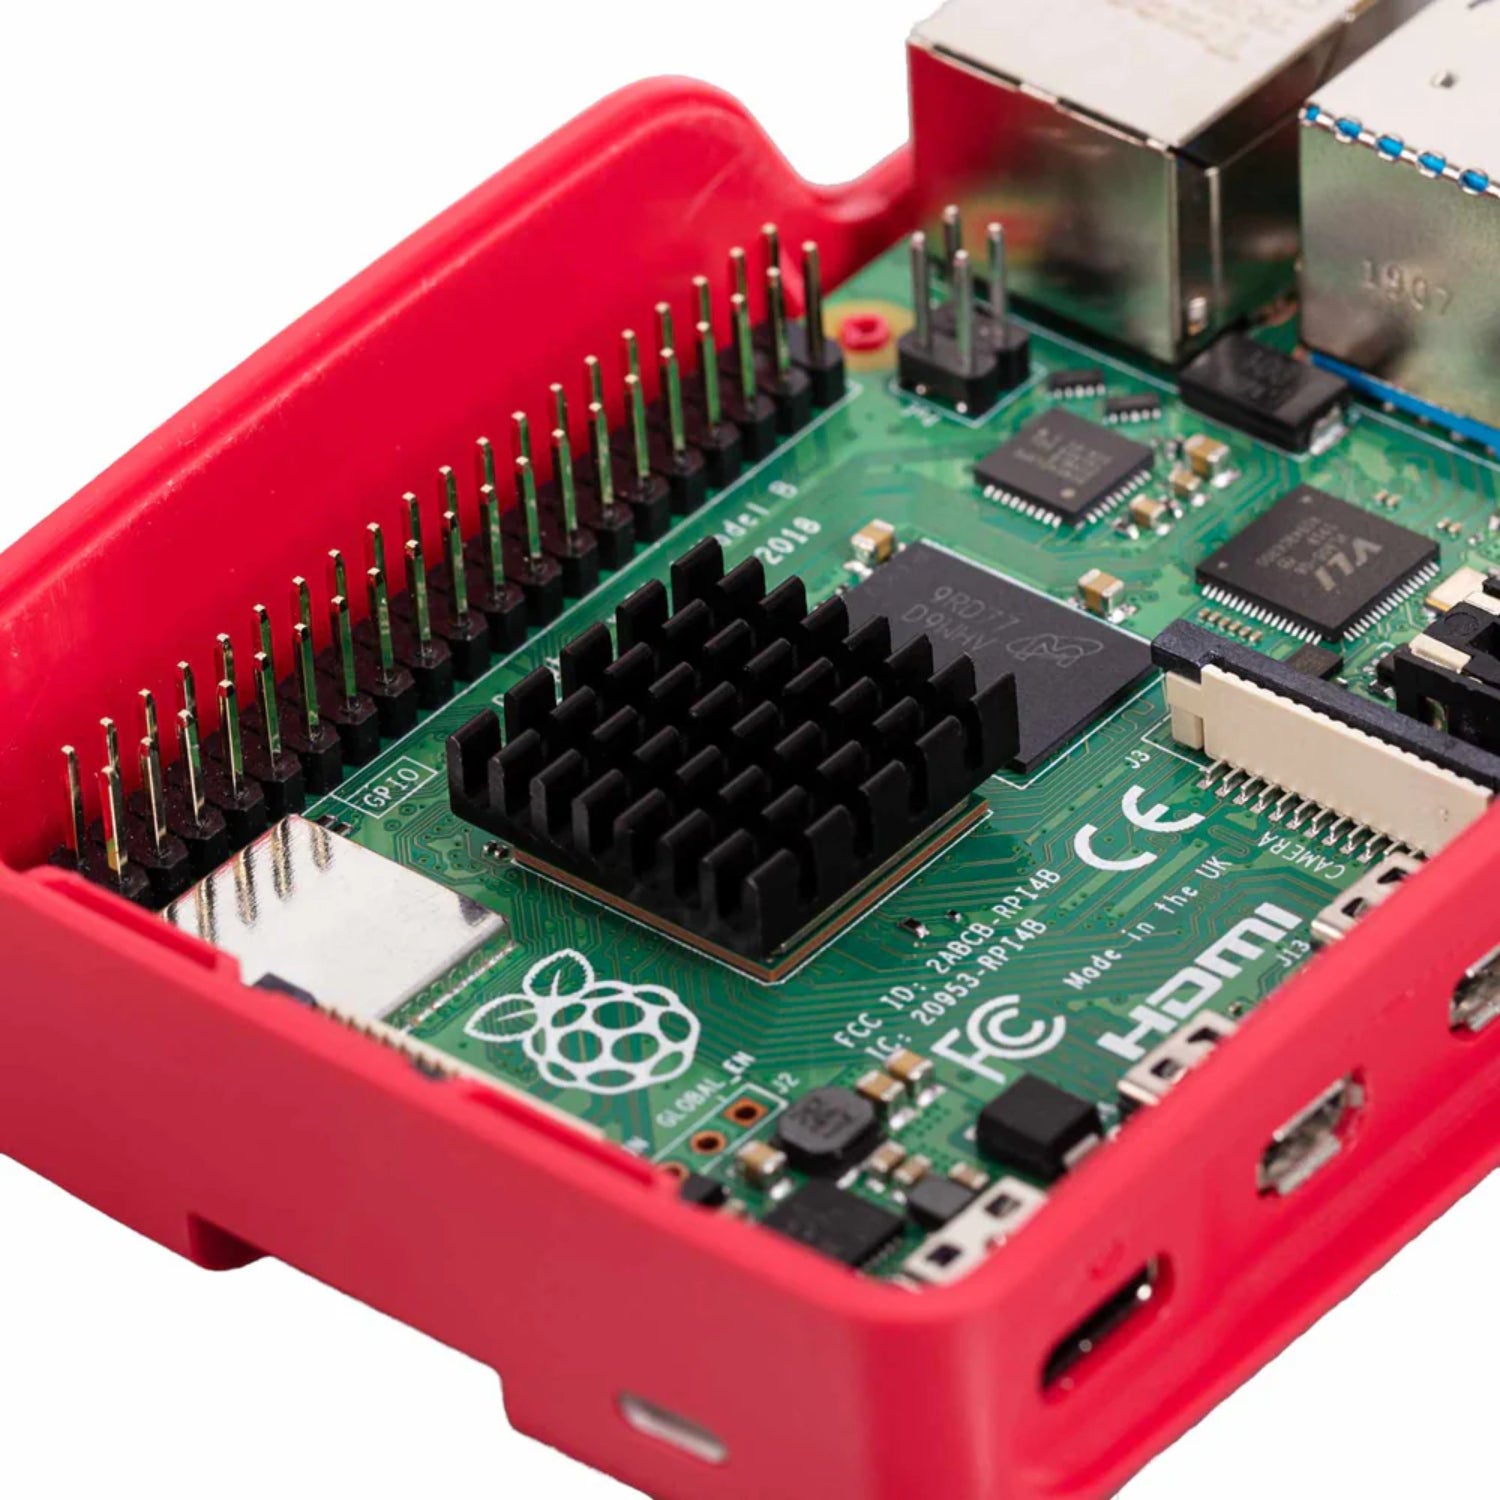
This Case Fan isn't alone in its cooling mission! It also comes with a heatsink specifically for the CPU, which works in tandem with the fan to efficiently draw heat away from your processor.
Specifications:
- Model number: TIFAC0091
- Power Connector Type: 2Pin
- Input Voltage: 5V DC supplied via 40-pin GPIO header on Raspberry Pi 4
- Fan Speed Control: Pulse width modulation control via user-selectable GPIO pin
- Maximum Airflow: 1.4 CFM
- Case Material: Clear PC
Features:
- Fits perfectly into the lid of the Raspberry Pi 4 Case
- Temperature-controlled fan delivers up to 1.4CFM of air flow over the processor, memory, and power management IC
- 18mm × 18mm × 10mm heatsink with self-adhesive pad improves heat transfer from the processor
How To Assemble The Fan:
- Remove any SD card, then put your Raspberry Pi into the lower half (base) of your case. Take care to align the mounting holes in the corners with the bumps in the case.
- Insert the fan into the upper half (lid) of the case, with the green label facing away from the lid. Push gently but firmly so that the two tabs on the fan housing click neatly into place inside the tabs on the lid. The slightly curved edge of the housing should be flush with the underside of the lid.
- If you are fitting the heatsink, remove the backing paper from the self-adhesive pad on the base of the heatsink, position it centrally over the processor, and gently press it into position.
- Connect the three leads from the fan to the Raspberry Pi's GPIO pins, as shown in the diagram below. Take care to connect each lead to the correct pin.
- Fit the lid of the case onto the base.

Using Your Fan
Once you have connected your fan, by default it will be on whenever your Raspberry Pi is running. You can configure it to turn on only when your Raspberry Pi reaches a temperature that you choose.
Using a recent version of Raspberry Pi OS, first update to retrieve any recent changes to the operating system:
- Open the Terminal, either from the Start menu (click the Raspberry Pi icon in the top left corner) or by pressing Control + Alt + T.
- Type sudo apt update and then, when the update has finished, type sudo apt full-upgrade.
Then open the Raspberry Pi Configuration tool:
- Click on the Raspberry Pi icon in the top left corner and select Preferences, then Raspberry Pi Configuration.
- Select the Performance tab.
- Next to Fan, click Enabled.
- If you have connected your fan as shown above, the default of 14 for Fan GPIO does not need to be changed.
- Select the Fan Temperature at which you want your fan to turn on. The default is 80°C, which will stop the Raspberry Pi from throttling on difficult tasks without having the fan on all the time.
Useful link:
Package Included:
1 x Raspberry Pi 4 Case Fan Pi 4 Case Fan