
vendor-unknown
Measure the Value of Moisture in soil and show the output using 5 Led interfacing with Arduino uno - KT878
Measure the Value of Moisture in soil and show the output using 5 Led interfacing with Arduino uno - KT878
SKU:KT878
1000 in stock
Couldn't load pickup availability
- For Bulk Order Click Here
- Need Customer Support?
- Free Delivery Above 999/-
Note: In case you receive a damaged or faulty product, please return it in the original box with all foam and packaging. Returns will not be accepted if further damage occurs due to improper packing.
If you order a product that is currently in Preorder, and the price of that item increases in the future, you will be required to pay the difference in price.
For refund/return/replacement, call us at +91 95995 94520 or email us at support@rees52.com
Delivery Time
Delivery Time
- Delivery time with the Express Shipping option is 2-3 working days, and with the Standard Shipping option is 5-6 working days. It varies based on location, reliant on courier services.
- Delivery time if the order item is on Preorder Status is 15-20 working days.
COD (Cash on Delivery)
COD (Cash on Delivery)
- For COD you have to pay extra charges of Rs 350/- before the shipment. (We will share the company QR Code, UPI ID or Account details for the same)
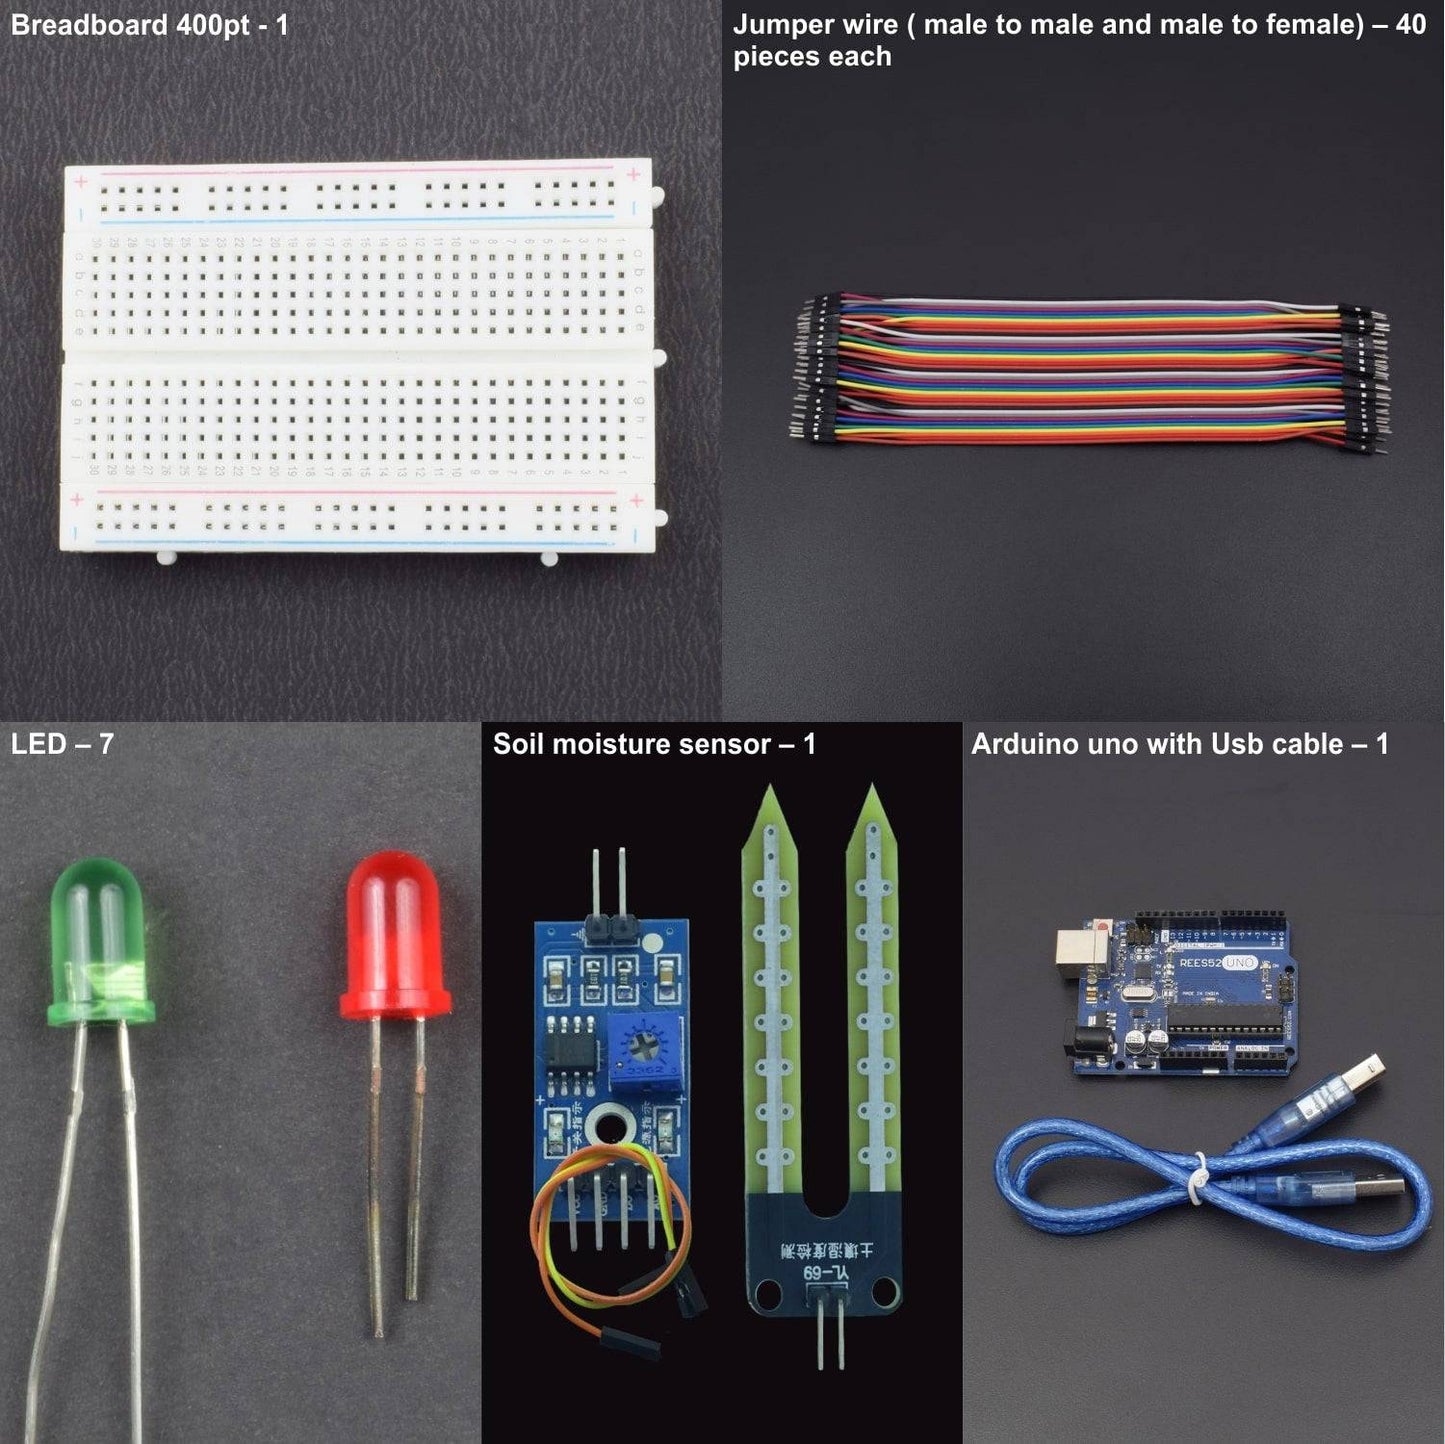
KIT INCLUDES:
- Arduino uno with Usb cable – 1
- Breadboard (400 point) - 1
- Jumper wire male to female– 40 pieces
- Jumper wire male to male – 40 pieces
- LED – 7
- Soil (not included in kit)
- Soil moisture sensor – 1
HARDWARE REQUIRED
- Arduino uno with Usb cable – 1
- Breadboard (400 point) - 1
- Jumper wire male to female– 40 pieces
- Jumper wire male to male – 40 pieces
- LED – 7
- Soil (not included in kit)
- Soil moisture sensor – 1
SOFTWARE REQUIRED
Arduino IDE 1.8.5 (programmable platform for Arduino)
Click To Download :https://www.arduino.cc/en/Main/Software

SPECIFICATIONS
SOIL MOISTURE SENSOR KIT
The two probes are acting as a variable resistor – more water in the soil means better conductivity and results in a lower resistance and a higher SIG out. Your analog readings will vary depending on what voltage you use for Vcc as well as the resolution of your ADC pins.

PIN DESCRIPTION
SOIL MOISTURE SENSOR KIT

The two probes are acting as a variable resistor – more water in the soil means better conductivity and results in a lower resistance and a higher SIG out. Your analog readings will vary depending on what voltage you use for Vcc as well as the resolution of your ADC pins.
LED

CIRCUIT CONNECTION

Digital Pin 2 Green wire led
Digital Pin 3 Green wire led
Digital Pin 4 Green wire led
Digital Pin 5 Yellow wire led
Digital Pin 6 Red wire led
Connect the cathode or (-) lead from the LED to the Arduino.
**Here you can put a 1k resistor between anode (+) and the positive rail.
Connect the anode or (+) lead from the LED to the + positive rail of the breadboard.
The moisture has very well defined pin out.
Connect the ground to the ground rail, power to the power rail.
Connect the "AC" Labeled pin on the moisture sensor to analog input 0 pin on the Arduino.
*note, the moisture sensor It has two outs one labeled "AC" and one labeled "DC". The "AC", is a serial signal 0-5 volts that when fully dry it outputs 5 volts, when fully wet, 0 volts. The "DC", is configured with the trim pot and is brought high when the moisture level reaches a desired point.
- Connect the two pins from the Sensor to the two pins on the Amplifier circuit via hook up wires.
- Connect the Vcc from the Amplifier to the 3.3V pin on the Arduino and the Gnd pin to the Gnd pin on the Arduino.
- Now connect the Analog Data Pin to the A0 pin on the Arduino (Since I'm interested in Analog Data).
CODE
CLICK TO SEE THE CODE
WORKING
Connect the Arduino board and put the sensor kit into the sand glass you will see the output as the intensity of glowing of led.