


REES52
Make an IOT Weather Station Kit using DHT22 Module and OLED interfacing with ESP8266-12E compatible Arduino Uno - KT861
Make an IOT Weather Station Kit using DHT22 Module and OLED interfacing with ESP8266-12E compatible Arduino Uno - KT861
SKU:KT861
46 in stock
Couldn't load pickup availability
- For Bulk Order Click Here
- Need Customer Support?
- Free Delivery Above 999/-
Note: In case you receive a damaged or faulty product, please return it in the original box with all foam and packaging. Returns will not be accepted if further damage occurs due to improper packing.
If you order a product that is currently in Preorder, and the price of that item increases in the future, you will be required to pay the difference in price.
For refund/return/replacement, call us at +91 95995 94520 or email us at support@rees52.com
Delivery Time
Delivery Time
- Delivery time with the Express Shipping option is 2-3 working days, and with the Standard Shipping option is 5-6 working days. It varies based on location, reliant on courier services.
- Delivery time if the order item is on Preorder Status is 15-20 working days.
COD (Cash on Delivery)
COD (Cash on Delivery)
- For COD you have to pay extra charges of Rs 350/- before the shipment. (We will share the company QR Code, UPI ID or Account details for the same)


INTROCUCTION
In this project, we designed an IOT based temperature and Humidity sensor using Node MCU and DHT11 by interfacing with the BLYNK application.
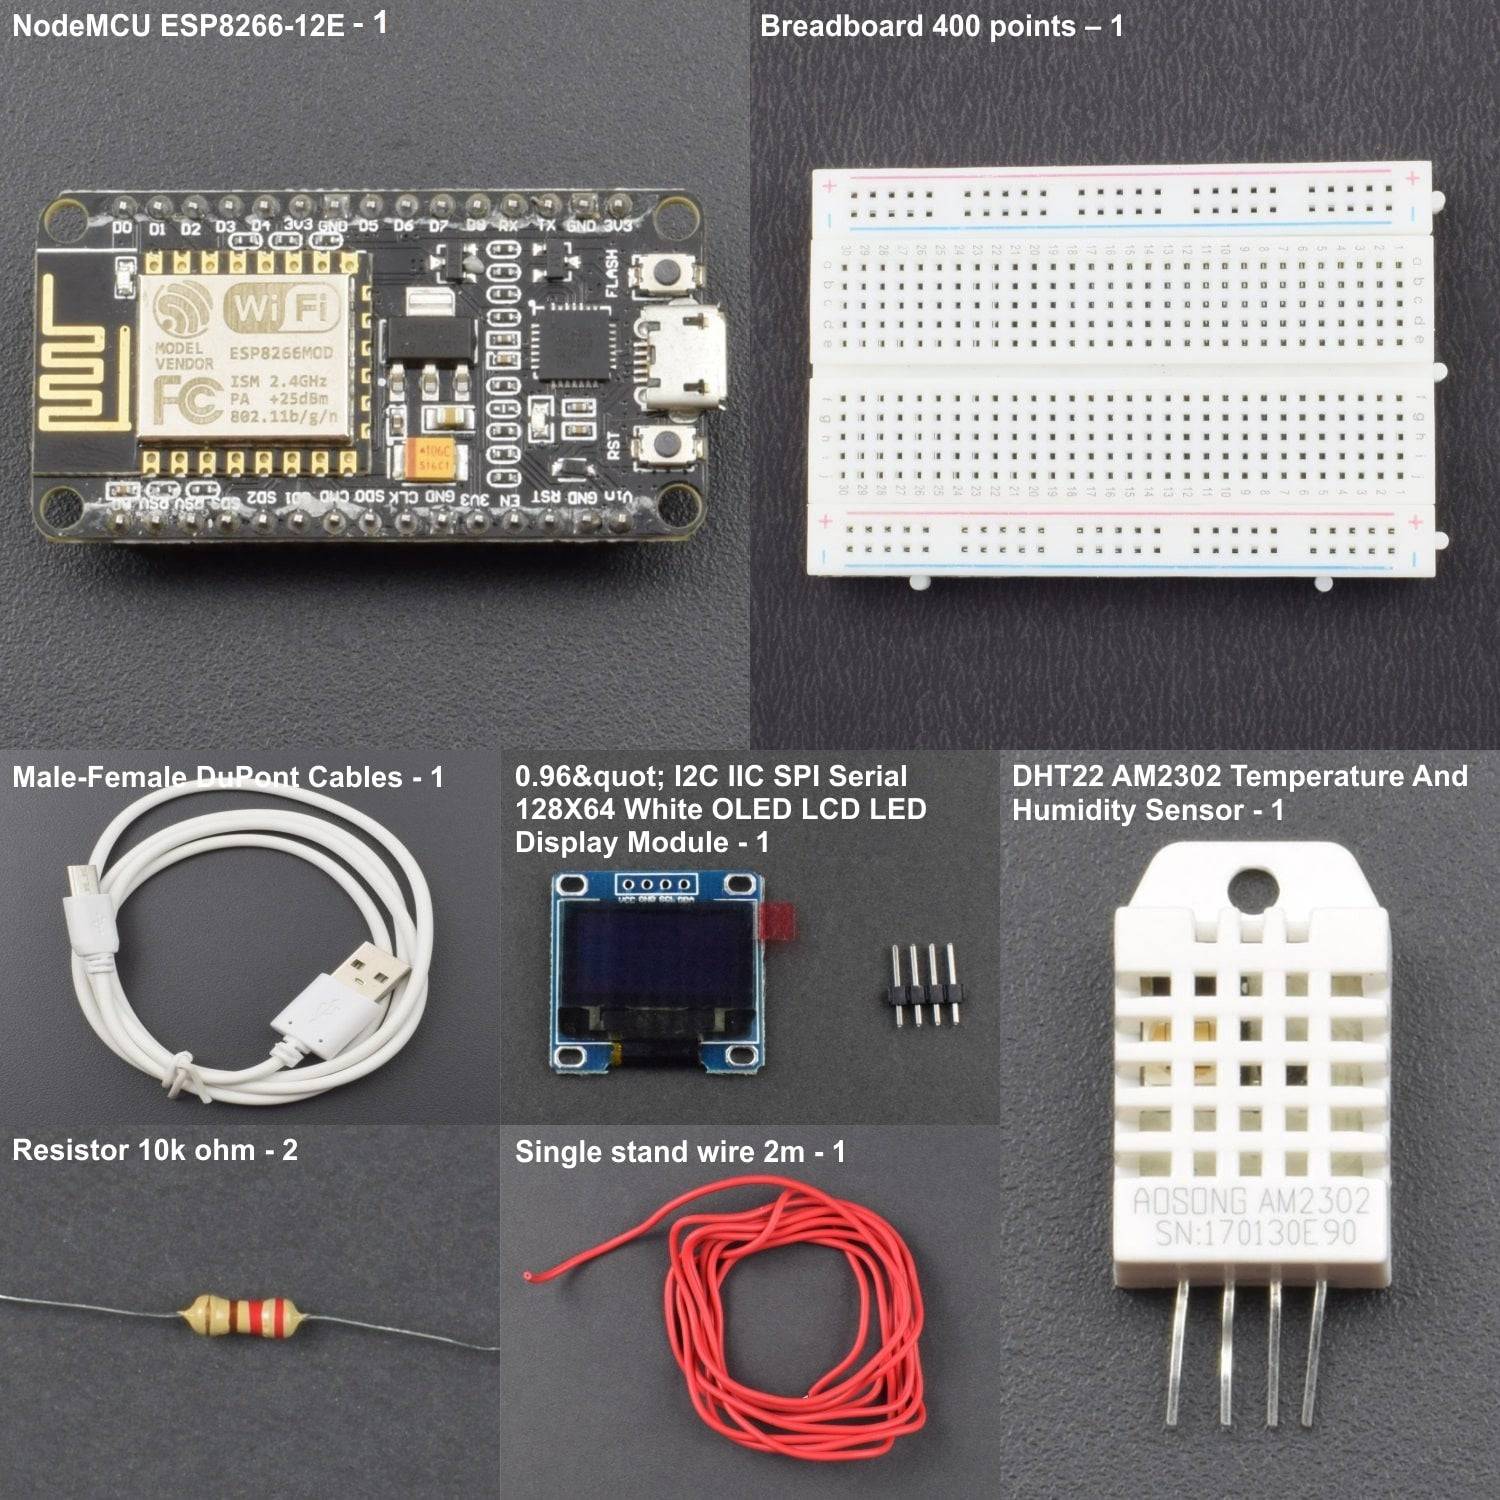
HARDWARE REQUIRED
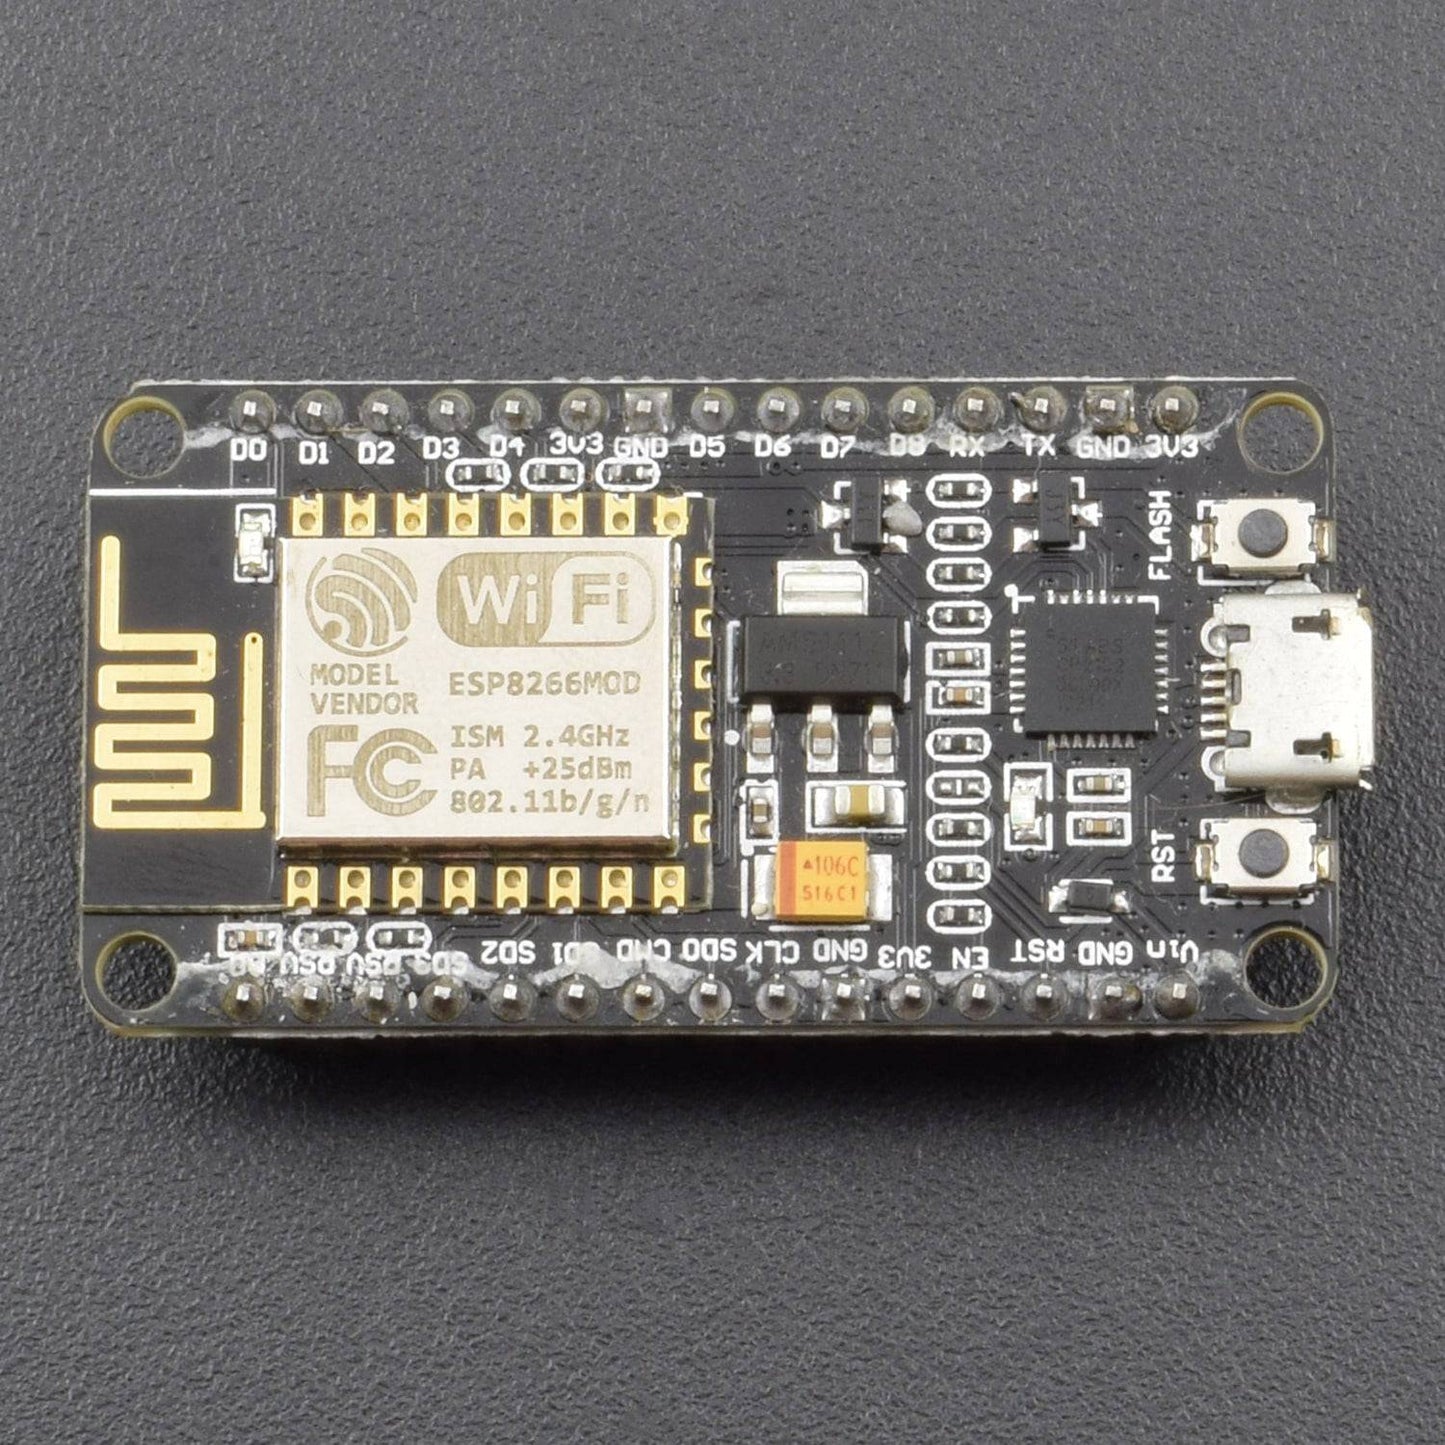
- Node MCU (esp82 66-12e v1.0) Wi-Fi Board -1pc
- NodeMcu USB Cable - 1pc
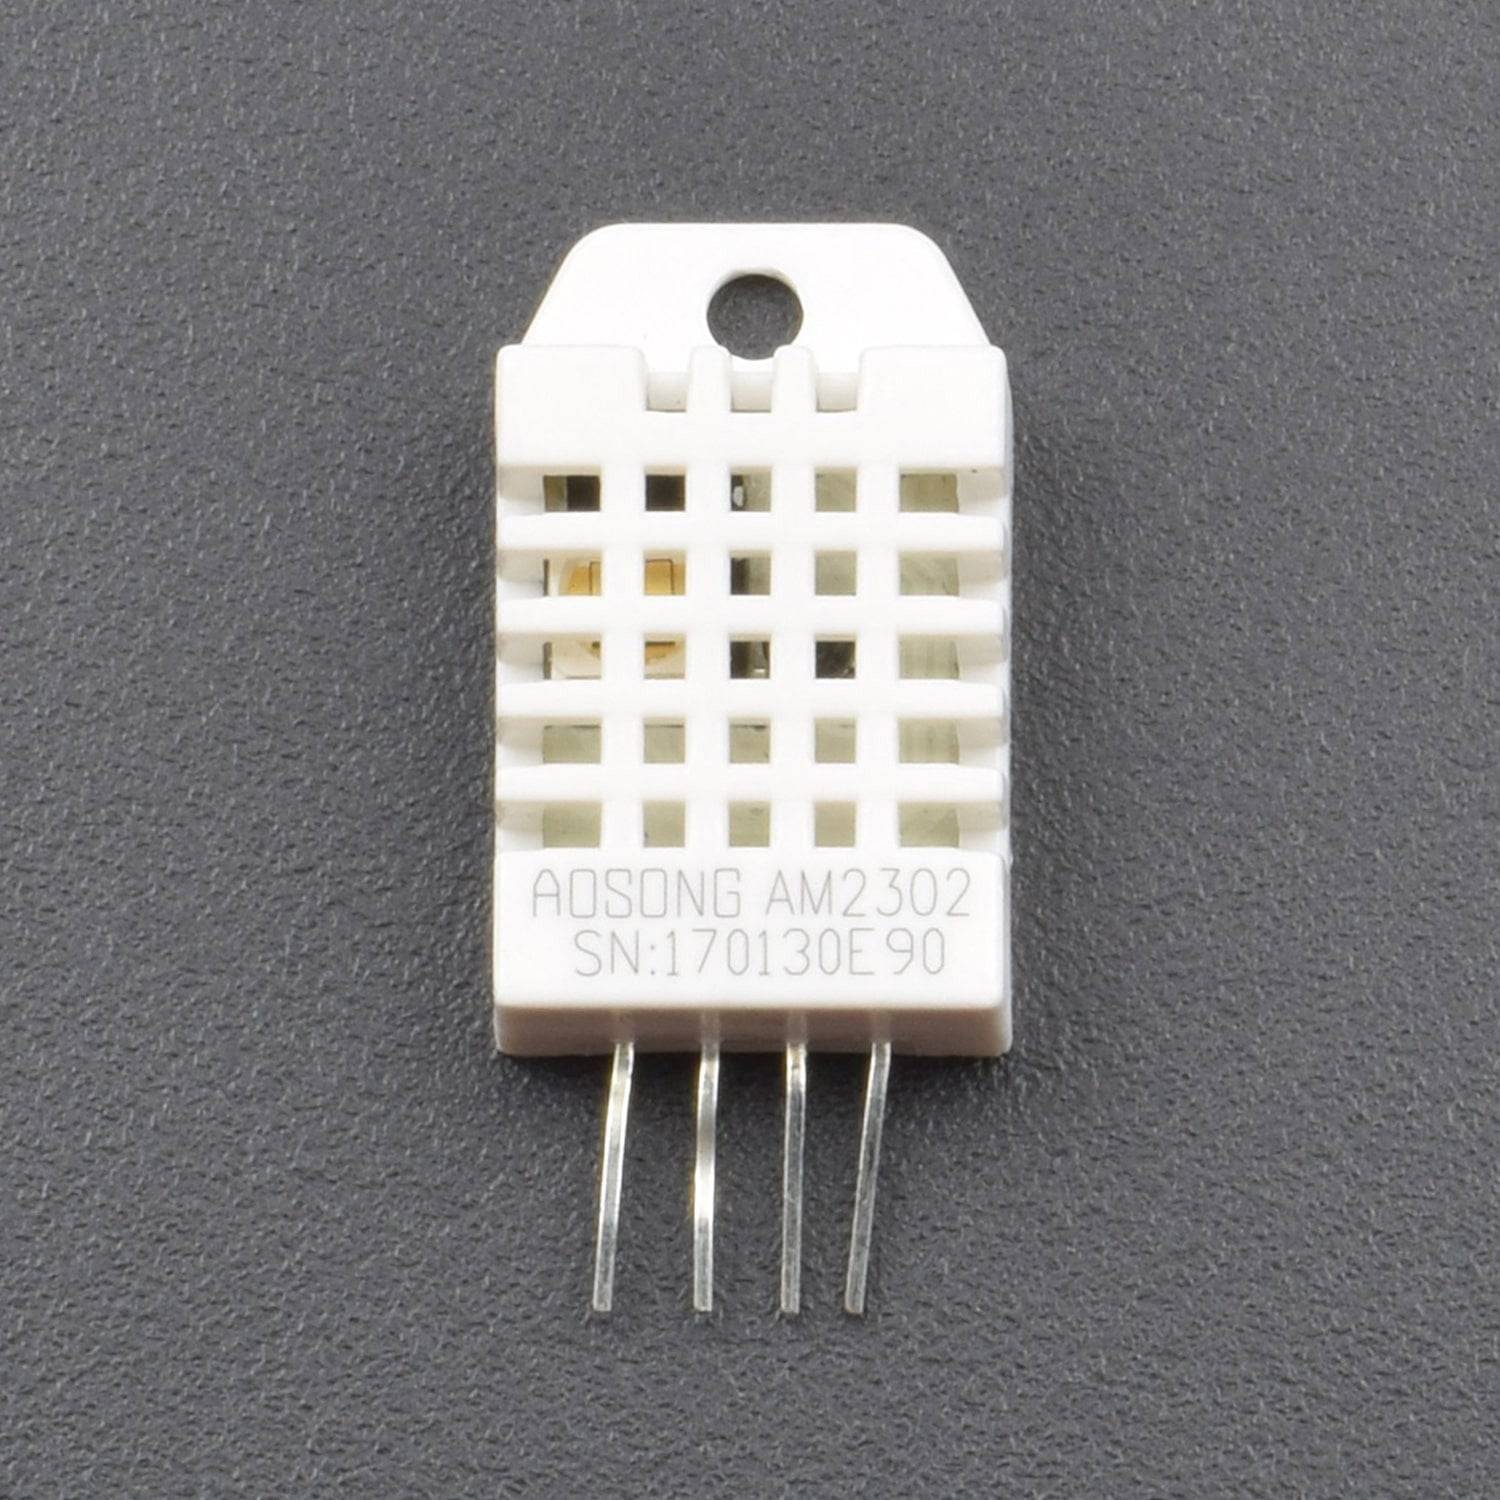
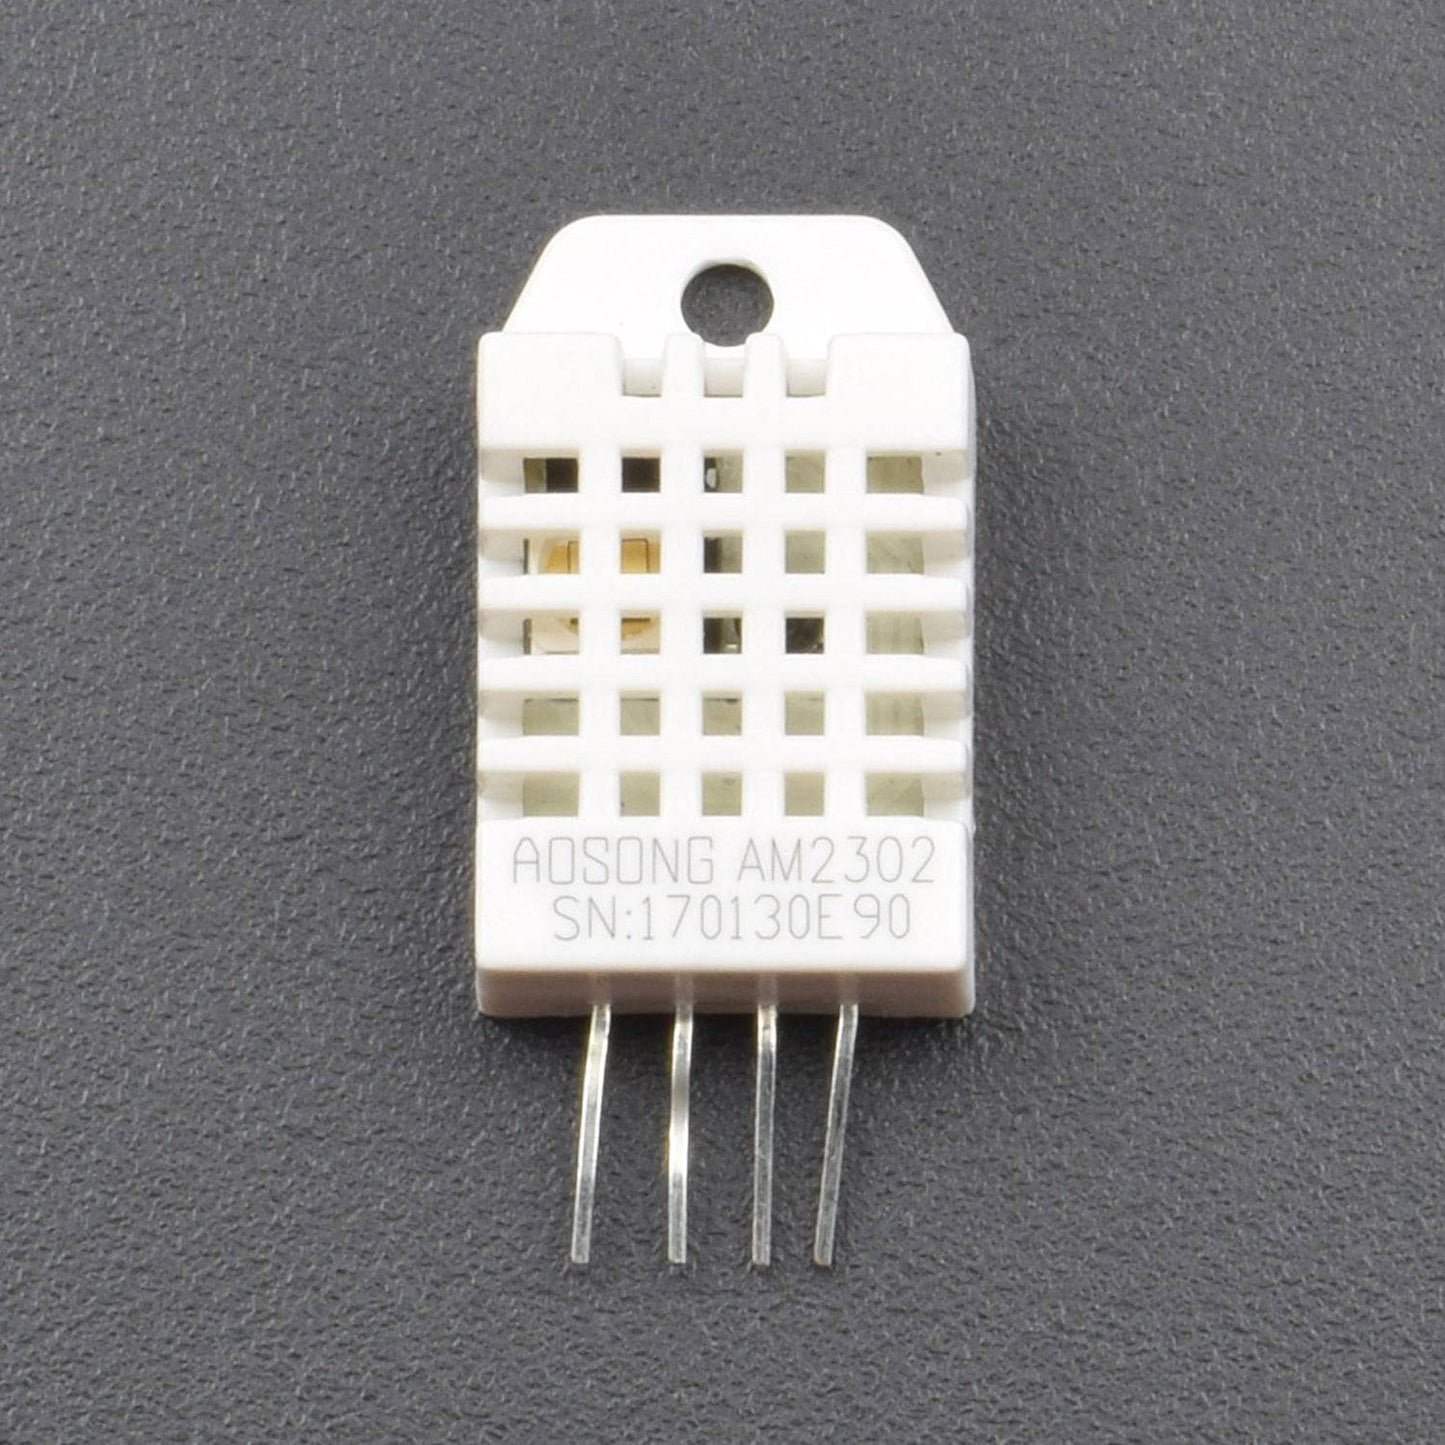
- DHT22 Sensor - 1pc
- Jumper Wires (male to male) – 20 pcs each
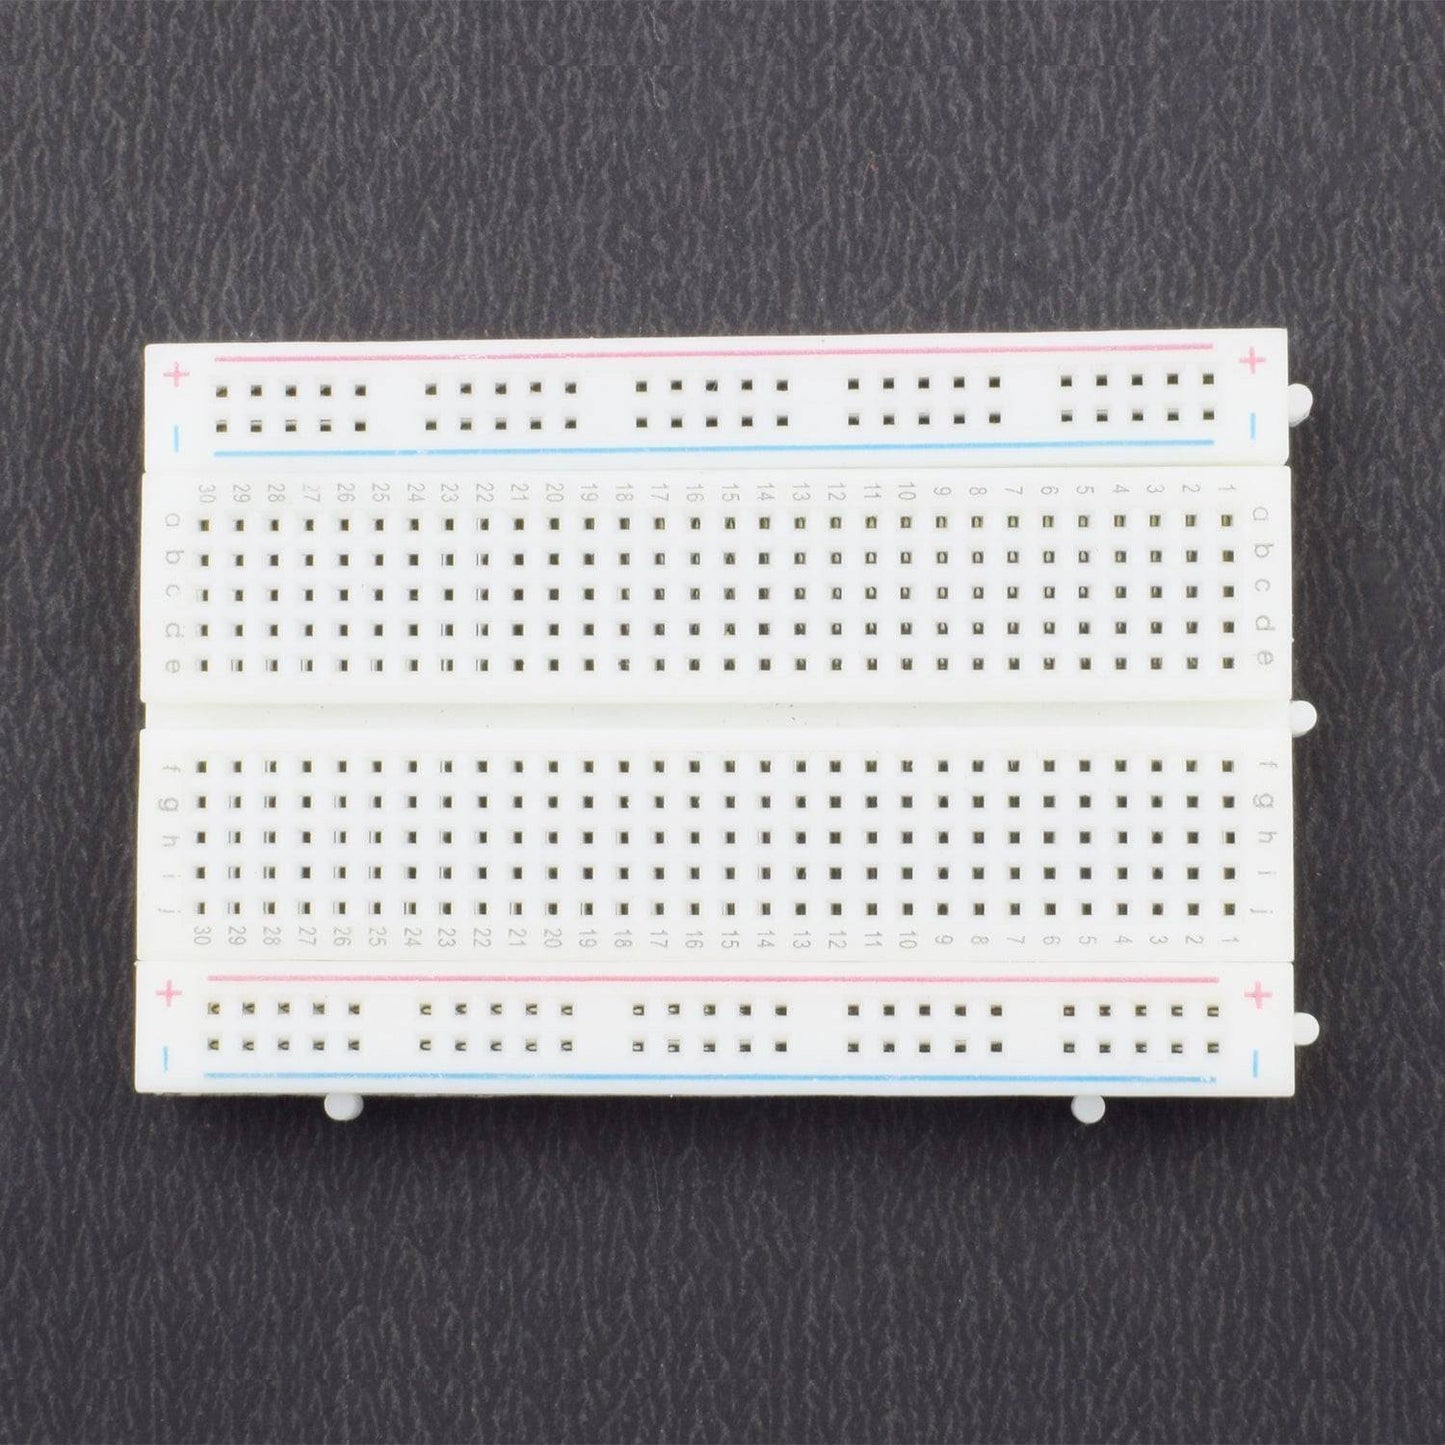
- 830 pt. Breadboard - 1pc
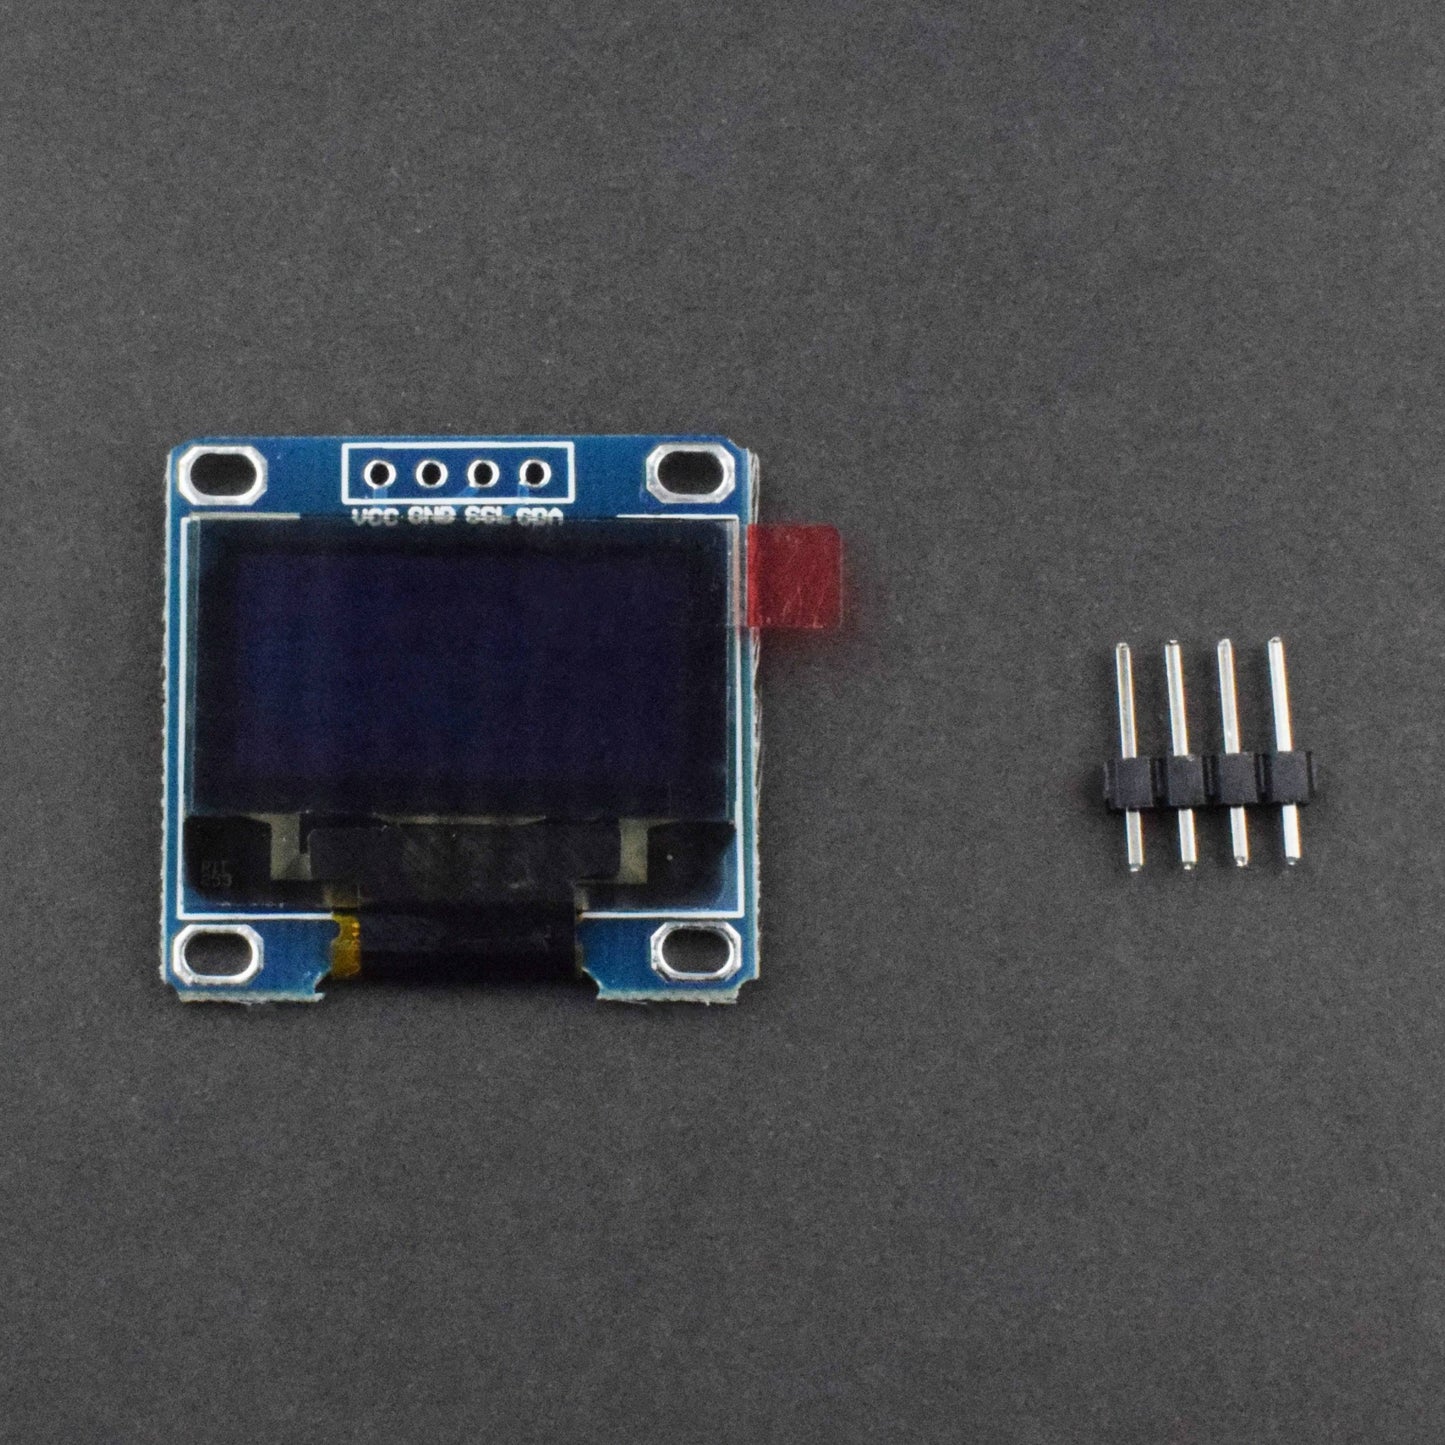
- 0.96 inch OLED Display -1pc
- 10K Ohm resistor - 2pcs
SOFTWARE REQUIRED
Arduino IDE 1.8.10 (programmable platform for Arduino)
Click here to download the software

SPECIFICATIONS
NodeMCU ESP8266 CP2102 Module:
- ESP8266 CP2102 NodeMCU LUA ESP-12E WIFI Serial Wireless Module
- Built-in Micro-USB, with flash and reset switches, easy to program
- Full I/O port and Wireless 802.11 supported, direct download, no need to reset
- Arduino compatible works great with the latest Arduino IDE/Mongoose IoT/Micro Python

DHT22 Sensor:
- Voltage: 3 to 5V power and I/O
- Current: 2.5mA max current use during conversion (while requesting data)
- Humidity Range: Good for 0-100% humidity readings with 2-5% accuracy
- Temperature Range: -40 to 80°C temperature readings ±0.5°C accuracy
- Sampling rate: No more than 0.5 Hz (once every 2 seconds)
- 4 pins, 0.1' spacing.

OLED Display:
- Display: 0.96" OLED Display
- Dot matrix size: 128x64
- Controller IC: SSD1306
- Working Voltage: DC 3.3v - 5v
- Colour: Blue

INSTALL LIBRARY
Weather Station by Daniel Eichhorn
APPLICATION REQUIRED
BLYNK:
Download from the Google Play Store and the Apple Store
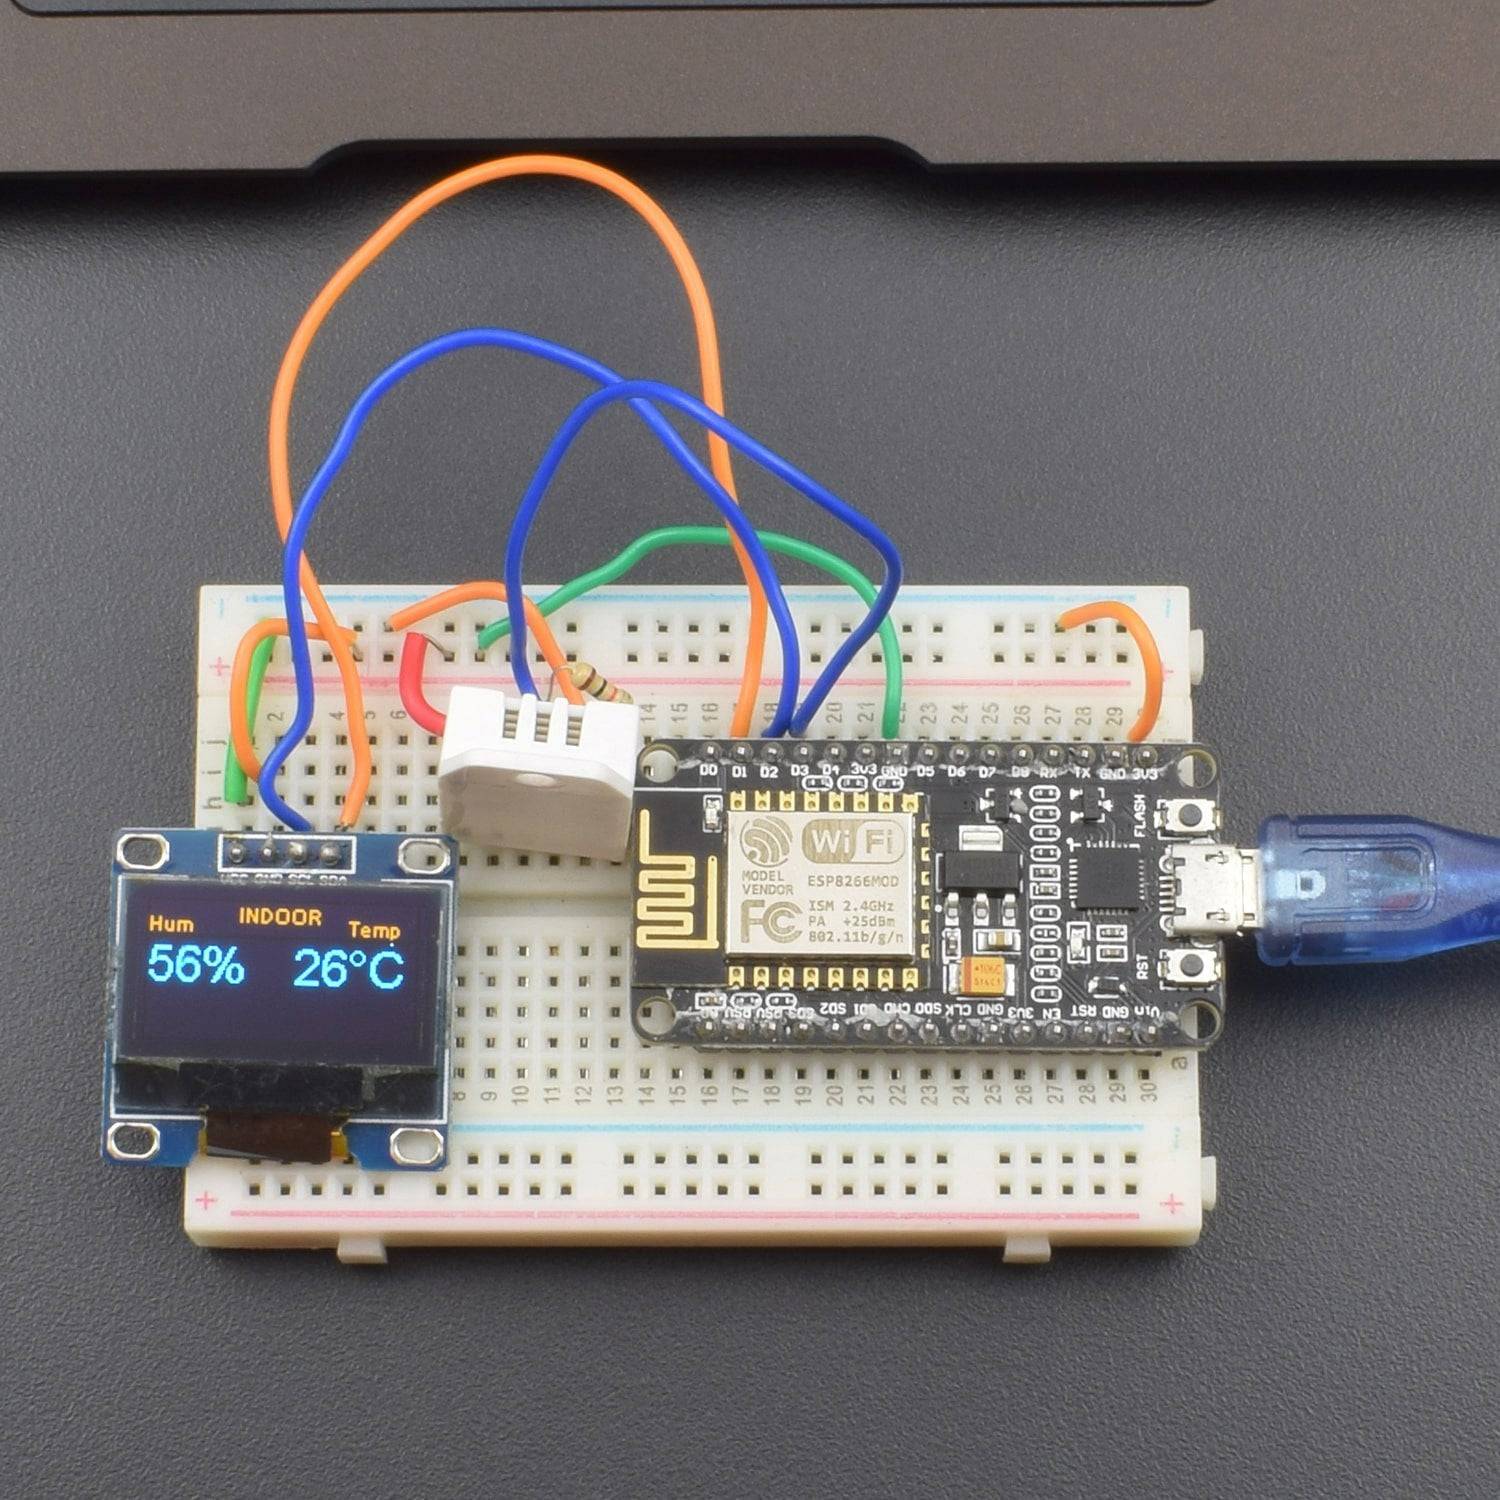
CIRCUIT CONNECTION
- Connect the OLED pins to the NodeMCU, as described below and shown in the below electrical diagram:
- SDA ==> D1 (5)
- SCL* ==> D2 (4) * Also, you can find "SDC" in the text
- VCC ==> The SSD1306 can be powered directly by 5v (external) or 3.3v from the NodeMCU module.
- GND ==> GND
- Once we have connected the display, let's download and install its library on our Arduino IDE.
- Below the library that must be downloaded and installed on your Arduino IDE:
Click to open drive


- Once you restart the IDE, the library should be already installed.
- The library supports I2C protocol to access the OLED display using the built in Wire.h library:
CODE
Must mention your correct Wi-Fi ID and Password in the code
GETTING INDOOR DATA
- Usually, you will use the sensor on distances less than 20m a 10K ohm resistor should be connected between the Data and VCC pins. The Output pin will be connected to NodeMCU pin D3 (Given in the Diagram below)
- Once the sensor is installed on our module, download the DHT library from the Adafruit GitHub repository and install it in your Arduino's Library file. Once you reload your Arduino IDE, the "DHT sensor library" should be installed.
- Click to download the Outdoor weather data by clicking on this Weather Underground. ( https://www.wunderground.com/ )

- You will need to create an account on their website and get a Weather API key. Do it following the instructions at below link: https://www.wunderground.com/weather/api
