


KIT INCLUDES:
- Node MCU (esp82 66-12e v1.0) Wi-Fi Board -1
- NodeMcu USB cable - 1
- DHT11 Module - 1
- Jumper Wires (male to male) – 20 pcs each
- 830 pt. breadboard - 1
- 0.96 inch Oled Display -1
Introduction
In this project, we have used to design an IOT based temperature and Humidity using Node MCU and DHT11 by interfacing with the BLYNK application.
HARDWARE REQUIRED
- Node MCU (esp82 66-12e v1.0) Wi-Fi Board -1
- NodeMcu USB cable - 1
- DHT11 Module - 1
- Jumper Wires (male to male) – 20 pcs each
- 830 pt. breadboard - 1
- 0.96 inch Oled Display -1
SOFTWARE REQUIRED
Arduino IDE 1.8.10 (programmable platform for Arduino)
Click To Download: https://www.arduino.cc/en/Main/Software

SPECIFICATIONS
NodeMCU ESP8266 CP2102 NodeMCU WIFI Serial Wireless Module
- ESP8266 CP2102 NodeMCU LUA ESP-12E WIFI Serial Wireless Module
- Built-in Micro-USB, with flash and reset switches, easy to program
- Full I/O port and Wireless 802.11 supported, direct download no need to reset
- Arduino compatible works great with the latest Arduino IDE/Mongoose IoT/Micro python

DHT11 Module
- Operating Voltage: 3.5V to 5.5V
- Operating current: 0.3mA (measuring) 60uA (standby)
- Output: Serial data
- Temperature Range: 0°C to 50°C
- Humidity Range: 20% to 90%
- Resolution: Temperature and Humidity both are 16-bit
- Accuracy: ±1°C and ±1%

1 |
Vcc |
Power supply 3.5V to 5.5V |
2 |
Data |
Outputs both Temperature and Humidity through serial Data |
3 |
Ground |
Connected to the ground of the circuit |
OLED Display


- Voltage: 3V ~ 5V DC. Working Temperature: -30 ℃ ~ 70 ℃
- Ultra-low power consumption: full screen lit 0.08W
- Supports many control chip: Fully compatible with Arduino, 51 Series, MSP430 Series, STM32 / 2, CSR IC, etc.
- High resolution: 128 * 64. Viewing angle:> 160 °
LIBRARY REQUIRED
To install the libraries after downloading Go to -> SKECTH -> INCLUDE LIBRARIES -> ADD .ZIP LIBRARIES
"SSD1306.h" - https://drive.google.com/open?id=1cZdPPBtF36JEOZMY7PNcEYoHRr6E_Nh3
ADAFUIT SENSOR LIBRARY - https://drive.google.com/open?id=1Ay3ndz8r8L5okePKV1k_Y0XhvYApzK-Y
APPLICATION REQUIRED
BLYNK
Download from Google play store and Apple Store


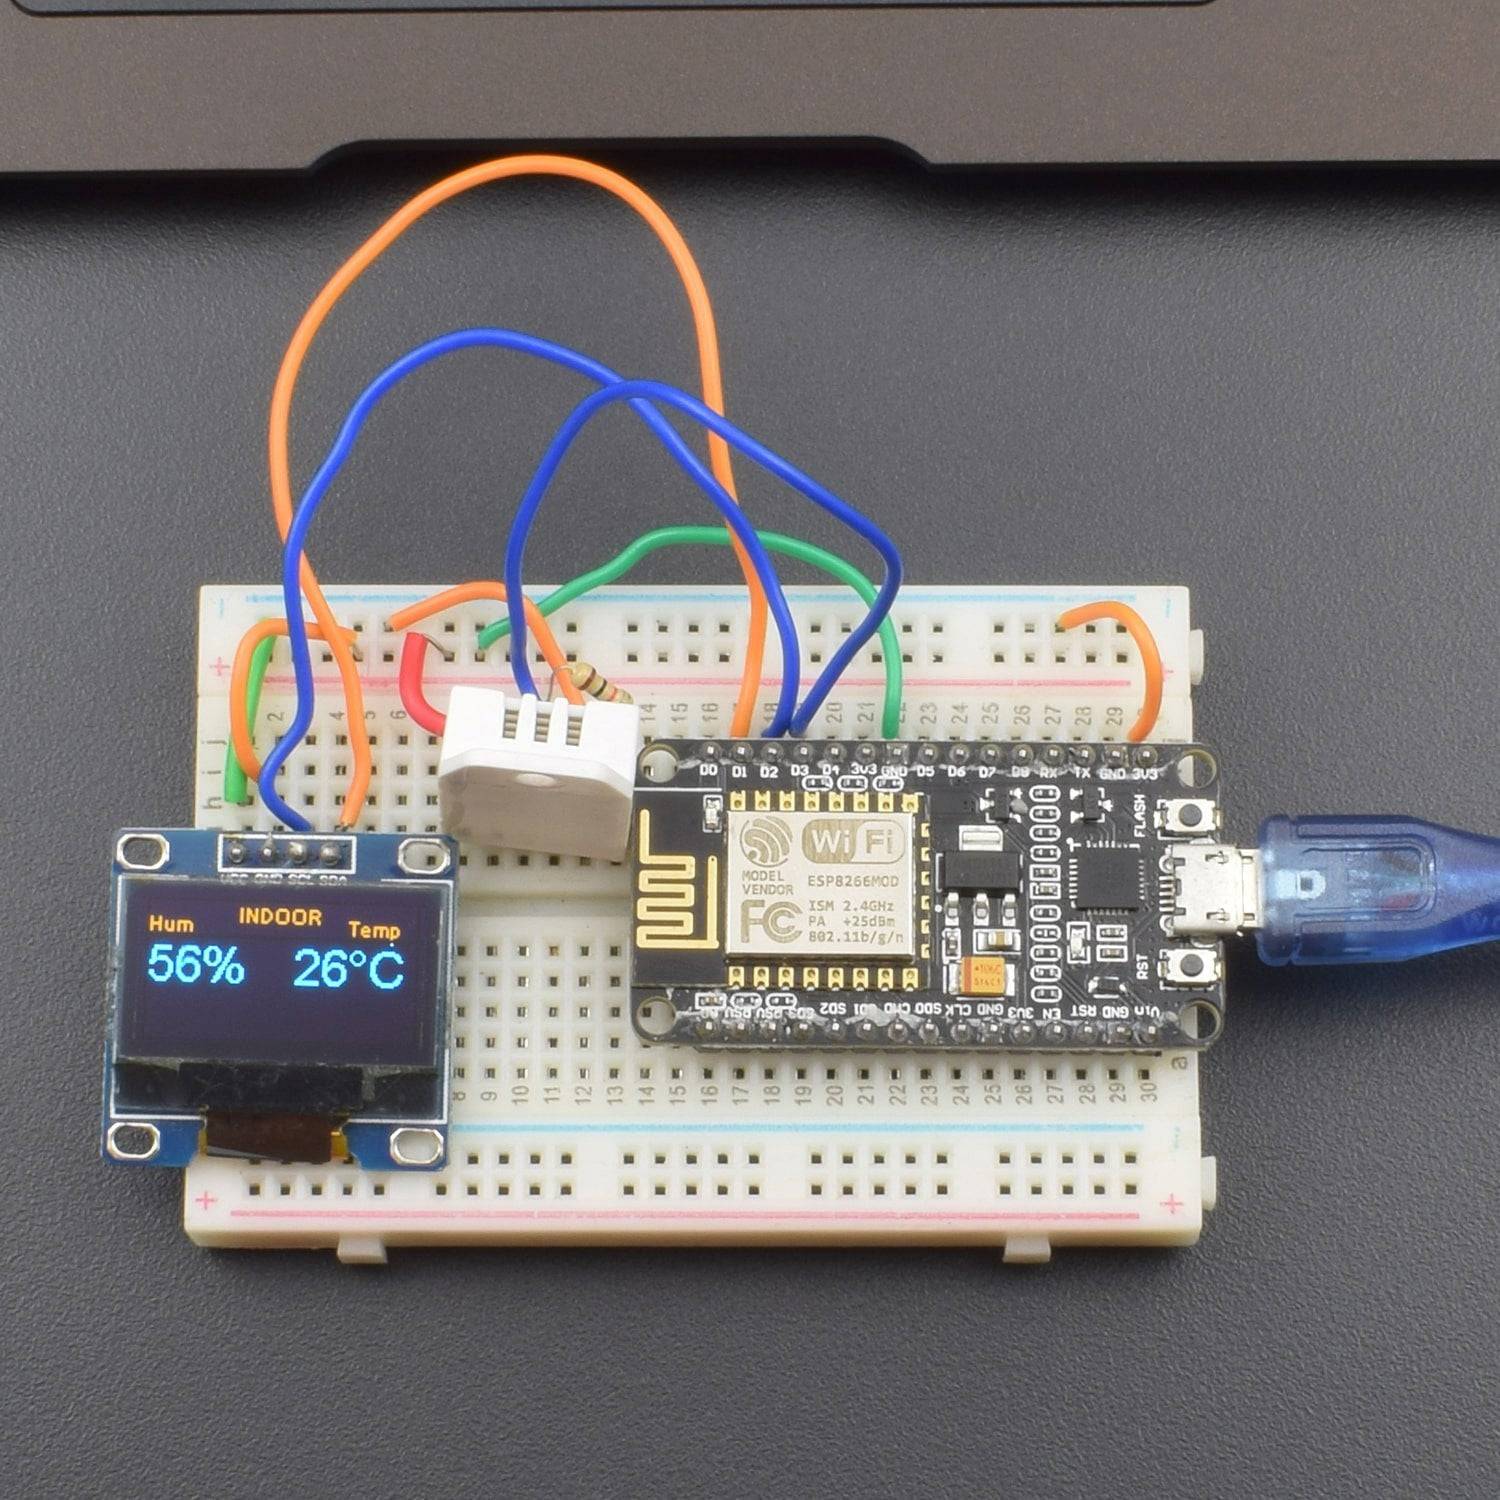
CIRCUIT CONNECTION
- Connect DHT11 “S” pin to node mcu pin D2.
- Connect DHT11 “V” pin to node MCU pin 3v3.
- Connect DHT11 ground to node MCU ground.
- Connect OLED ground to node MCU ground.
- Connect OLED VCC to node MCU 3v3.
- Connect OLED SCL to node MCU D5.
- Connect OLED SDA to node MCU D3.

CODE
Click to see the code
https://drive.google.com/open?id=1Kkg6iRF64YKpPHwylHdgwNDOx3iXVJZo
Must mention your correct Wi-Fi ID and Password in the code
WORKING AND OUTPUT
Welcome to the Node MCU Based project.
To connect with Blynk Application. First, you need to create a new project An AUTH token will be sent to your registered Email ID which you need to note down. You need to insert the key in the given code.

Open the Widget Box and select the Labeled value widget option from the Dropdown list

- Click on the plus icon and select Labelled value forTemperature.
- Define the pins in our case V5.

- Change the min to 0 Max to 50.
- Now again click the icon and select Labelled value for Humidity. And change the max 100%. And define the pin in our case V6

- now click on play button and you will get temperature and humidity.
- The output will show in the figure below.


Click to watch the tutorial
For more tutorials subscribe our channel REES52 on YouTube