


vendor-unknown
Control the Led’s by using specific direction by magic light cup and mercury open optical module using Arduino Uno - KT902
Control the Led’s by using specific direction by magic light cup and mercury open optical module using Arduino Uno - KT902
SKU:KT902
100 in stock
Couldn't load pickup availability
- For Bulk Order Click Here
- Need Customer Support?
- Free Delivery Above 999/-
Note: In case you receive a damaged or faulty product, please return it in the original box with all foam and packaging. Returns will not be accepted if further damage occurs due to improper packing.
If you order a product that is currently in Preorder, and the price of that item increases in the future, you will be required to pay the difference in price.
For refund/return/replacement, call us at +91 95995 94520 or email us at support@rees52.com
Delivery Time
Delivery Time
- Delivery time with the Express Shipping option is 2-3 working days, and with the Standard Shipping option is 5-6 working days. It varies based on location, reliant on courier services.
- Delivery time if the order item is on Preorder Status is 15-20 working days.
COD (Cash on Delivery)
COD (Cash on Delivery)
- For COD you have to pay extra charges of Rs 350/- before the shipment. (We will share the company QR Code, UPI ID or Account details for the same)
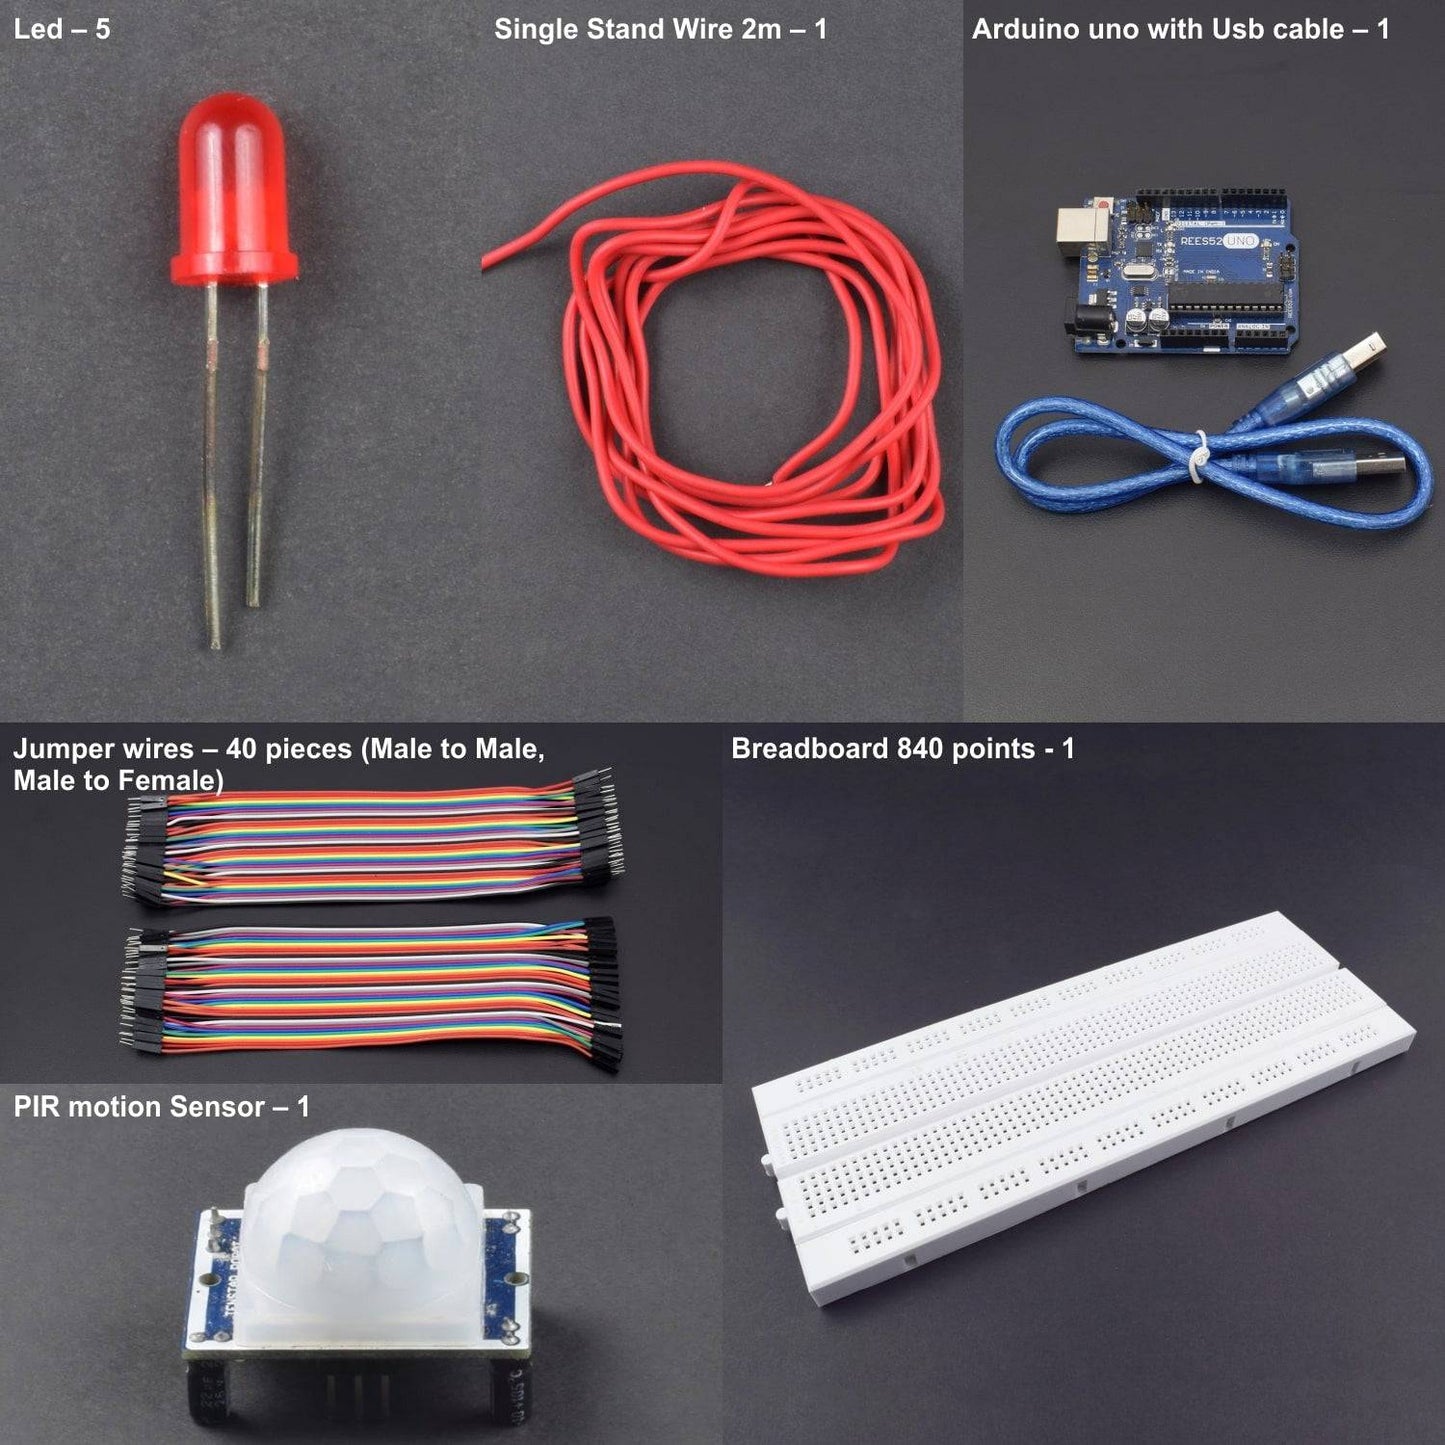

KIT INCLUDES:
- Arduino Uno with USB cable -1
- Resistor 1k – 2
- Breadboard 400 points- 1
- Magic Light Cup Module– 2
- Mercury open optical module – 1
- Led – 2
- Jumper Wires (male to male ) – 40 pieces
- Single stand wire 2mt – 1
HARDWARE REQUIRED
SOFTWARE REQUIRED
Arduino IDE
You can download it from this link: https://www.arduino.cc/en/Main/Software
PIN DESCRIPTION
MAGIC LIGHT CUP MODULE
Magic Light Cup modules are easy to Interactive Technology Division developed a can and ARDUINO interactive modules, PWM dimming principle is to use the principle of two modules brightness changes. Mercury switches provide a digital signal that triggers the PWM regulator, through the program design, We can see the light like two cups filled with the effect of shuffling back and forth.
- For Arduino DIY project
- Working Voltage: 5V
- Output: Digital output (0/1)
- PWM output
- Material: PCB
- Color: Black
- Dimensions: 0.91 x 0.79 x 0.59 inch / 2.3 x 2.0 x 1.5 cm
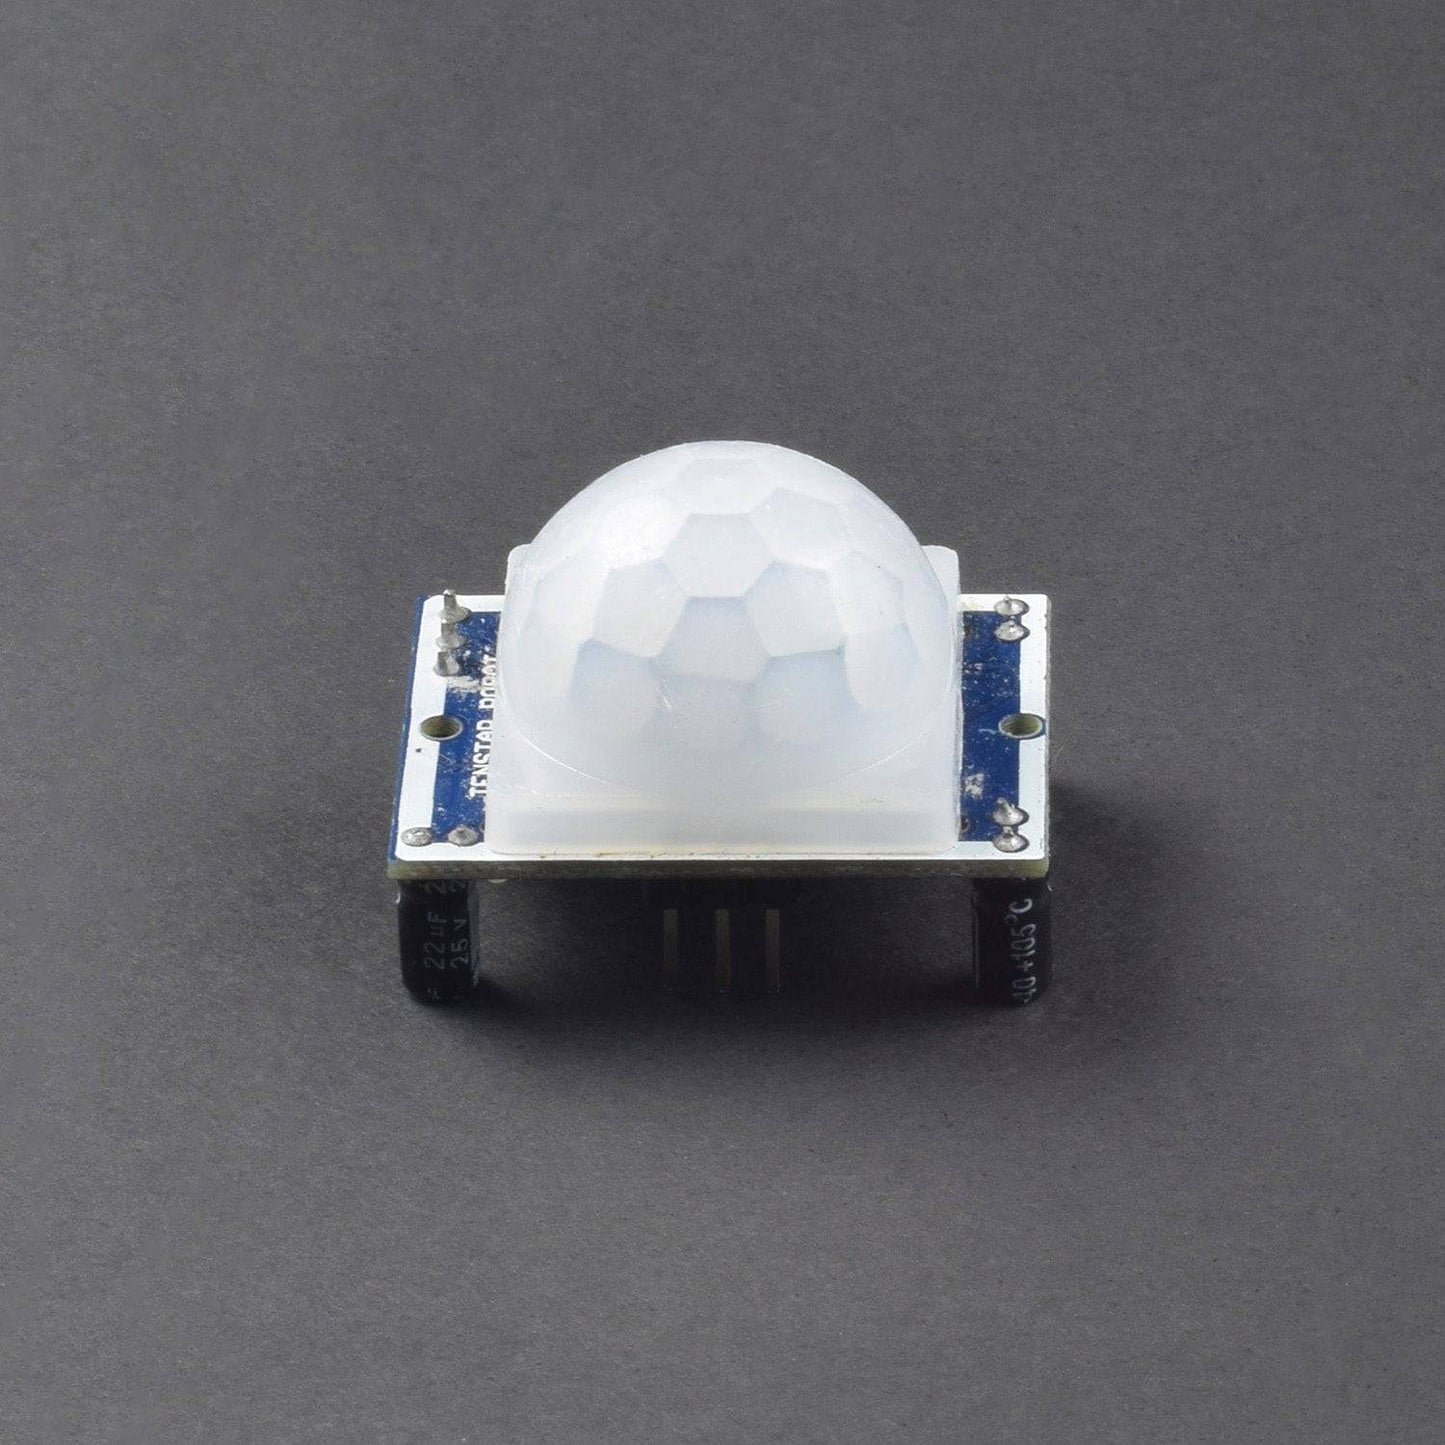
MERCURY OPEN OPTICAL TILT SWITCH MODULE
Operating voltage - 5v
Mercury switch module and a digital interface, built-in 13 LED build a simple circuit to produce tilt warning lamp 13 comes with digital interfaces of the LED, the mercury tilt switch sensor interface to access digital 3, when the tilt switch sensor senses a key signal, LED lights, otherwise off.
- Arduino GND --> Pin - of module
- Arduino 5+ --> Pin middel of module
- Arduino 3 --> pin S of module
Tilt case
Non Tilt case
CIRCUIT DESCRIPTION

Connection the PIR Sensor to Arduino
- first you connect the all sensors on bread board according to the given diagram and now
- provide the all sensors power and gnd take from arduino to breadboard for common connection.
- now connect the first module pin no 3&4 to arduino pin no 7 and 6.
- now connect the second sensor pin no 3 to arduino uno pin no. 3 and connect the led with this sensor put 1 k resistance on positive point of led ,second point to ground.
- now connect the third sensor module to pin no 3and 4 to arduino uno pin no5and 4 here is you connection complete of this circuit
CODE/strong>
CLICK TO SEE THE CODE:
OUTPUT
This is mercury tilt switch sensor these are the direction sensor uses in planes ,lift, many places.
In this sensor ,mercury in glass tube which provide the signals, it signals as blinking of led, if touch the another end of the sensor point.
This project have three sensor use for three type of working so how is it happen after the all connection we provide the supply to arduino uno now hold the bread board change the direction of the bread board you see the sensors light will change in three direction left,right,up direction use in a plain and then according the direction led’s will stated glowing.
- By turning the Breadboard left side , led connected to Magic light cup module will turn on.
- By turning the Breadboard right side , led connected to Magic light cup module will turn off.
- By turning the Breadboard on up side , led connected to mercury optical tilt switch will turn on.
- By turning the Breadboard on down side , led connected to mercury optical tilt switch will turn off.