

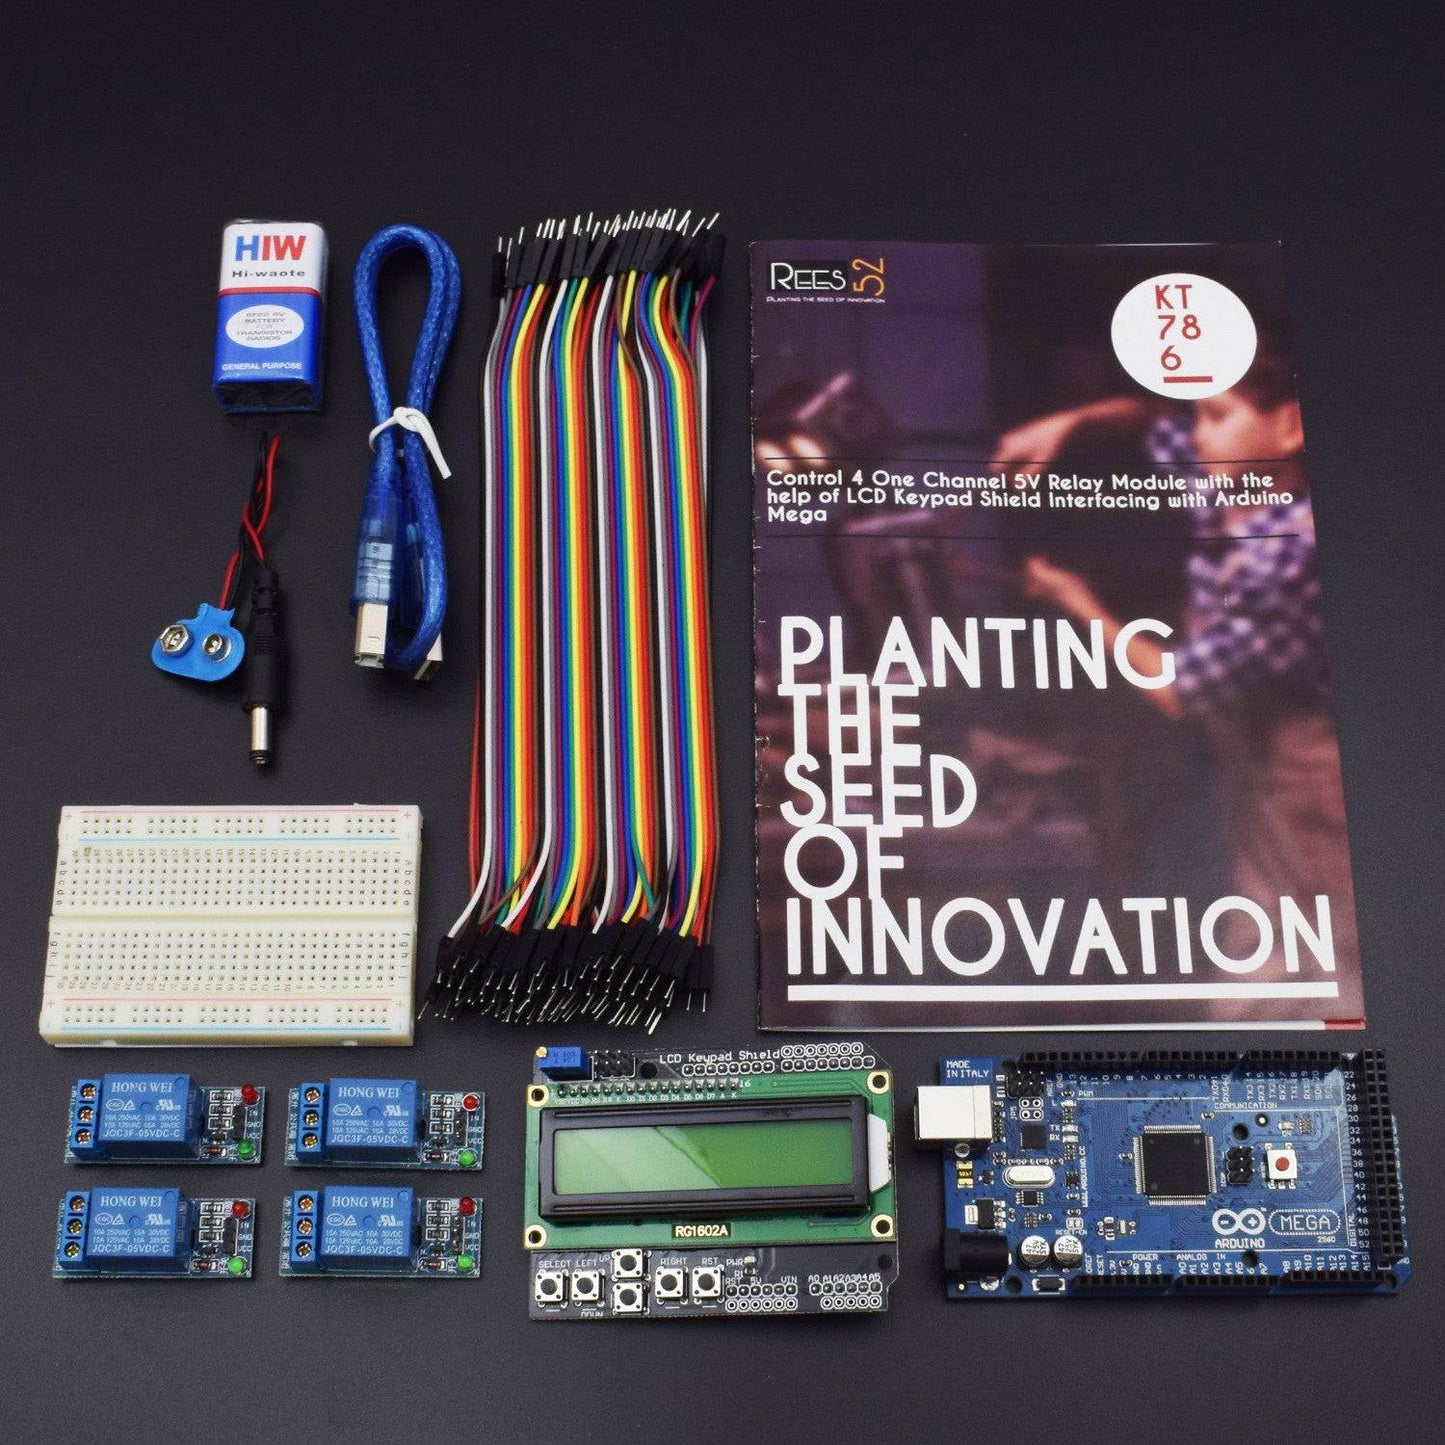
KIT INCLUDES:
- Arduino mega with USB Cable - 1
- 1 channel relay 5v - 4
- Jumper wires male to female – 40 pieces
- Jumper wires Male to male – 40 pieces
- LCD keypad shield – 1
- 9v Battery - 1
- Snapper with DC jack(you can use power bank also) - 1
- Breadboard (400 pin) -1
HARDWARE REQUIRED
- Arduino mega with USB Cable - 1
- 1 channel relay 5v - 4
- Jumper wires male to female – 40 pieces
- Jumper wires Male to male – 40 pieces
- 16*2 LCD keypad shield – 1
- 9v Battery - 1
- Snapper with DC jack(you can use power bank also) - 1
- Breadboard (400 pin) -1
SOFTWARE REQUIRED
Arduino IDE 1.8.5 (programmable platform for Arduino)
Click To Download: https://www.arduino.cc/en/Main/Software
SPECIFICATIONS
1 Channel 5V Relay Module
- Number of I/O Channels: 1
- Type: Digital
- Control signal: TTL level
- Max. Allowable Voltage: 250VAC/110VDC
- Max. Allowable Power Force: From C(800VAC/240W), From A(1200VA/300W)
16*2 LCD Keypad Shield
- Operating Voltage:5V
- 5 Push buttons to supply a custom menu control panel
- RST button for resetting Arduino program
- Integrate a potentiometer for adjusting the backlight
- Expanded available I/O pins
- Expanded Analog Pinout with standard DFRobot configuration for fast sensor extension
NOTE: To connect multiple GND and 5V wires soldering may be required.
PIN DESCRIPTION
1 Channel 5V Relay Module


16*2 LCD Keypad Shield
This is the description for 16*2 LCD Display which is placed on the Shield.


CIRCUIT CONNECTION
- Attach the LCD with the Arduino Mega from the Analog Pin A5 for desired circuit connection.
- Connect 5V of the Arduino Mega to the Positive rail and GND (Arduino Mega) to the Negative rail on the breadboard.
- Connect the GND Pin of Four 5V Relays to Negative rail and VCC of Four 5V Relays to Positive rail on the breadboard.
- Connect Pin IN (Signal) of Relay 1 to the D30, Pin IN (Signal) of Relay 2 D31, Pin IN (Signal) of Relay 3 to D32 and Pin IN (Signal) of Relay 4 to the D33 of Arduino Mega.
- Now Power it up and upload the code.

CODE
Click to see code here:
https://drive.google.com/open?id=1DdF3IGeoVQ6_RqlvvPT_EBn5M1J8vzcr
WORKING
Welcome to this Arduino Based LCD shield Module. This particular circuit also consists of 1 Channel 5V Relay Module to control the LCD. The 5V Pin of Arduino Mega is connected to the positive rail and ground to the negative rail on breadboard. The GND pin of all the 5V relay are attached to negative rail and VCC to positive rail on breadboard. Connect IN of relay 1 to the D30, IN of relay 2 to D31, IN of relay 3 to D32 and IN of relay 4 to the D33 of Arduino Mega.
It’s a simple code to control 4 relays with a keypad LCD shield for Arduino. You can add any device and the code is easy to modify. Just wire it up like the schematic, upload the code and it should work. If things don't work you probably don't have the library LiquidCrystal.h installed. (so you can download from Arduino IDE software SKETCH --> LIBRARY --> MANAGE LIBRARY Search for this Library where you uploaded the code).