


INTRODUCTION
Don't let the Smartphone weather apps or commercial weather stations (that feed you with data from stations based miles away) run your outdoor plans with this IOT project, you can be your weatherman.
In this project, we will learn how to make a mini weather station using ESP8266 & BME280 Barometric pressure sensor that can give real-time information on atmospheric pressure, temperature & humidity. Using BME280, we can even measure the altitude above sea level.
This project uses ESP8266 Nodemcu as the control device that easily connects to the existing wi-fi network & creates a web server. When any connected device accesses this web server, ESP8266 reads in temperature & altitude from BME280 & sends it to the web browser of that device with a nice interface.
HARDWARE REQUIRED
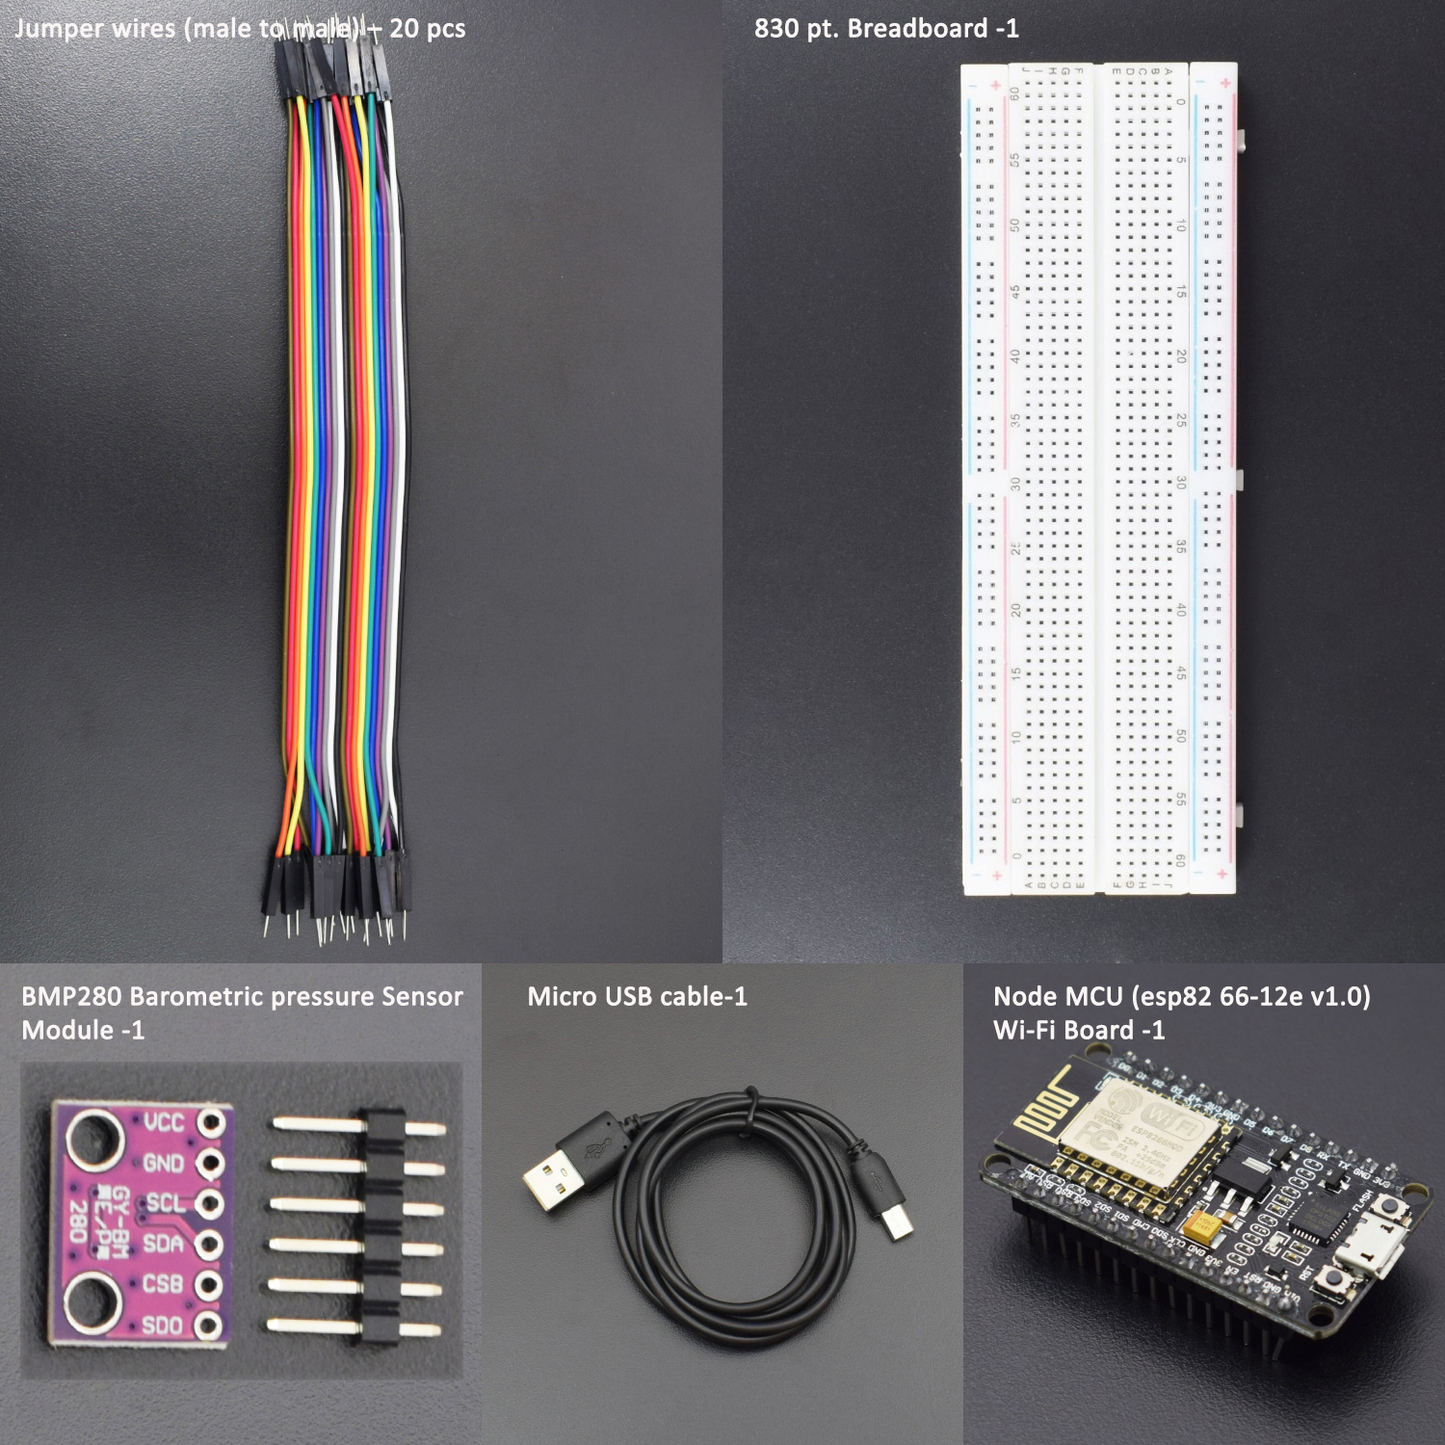
- Node MCU (esp82 66-12e v1.0) Wi-fi Board -1pc
- NodeMcu USB Cable - 1pc
- Jumper Wires (male to male) – 20 pcs
- BME280 Barometric Pressure Sensor Module -1pc
- 830 pt Breadboard- 1pc
SOFTWARE REQUIRED
Arduino IDE 1.8.10 (programmable platform for Arduino)
Click here to download the software

SPECIFICATIONS
NodeMCU ESP8266 CP2102 Module:
- ESP8266 CP2102 NodeMCU LUA ESP-12E WIFI Serial Wireless Module
- Built-in Micro-USB, with flash and reset switches, easy to program
- Full I/O port and Wireless 802.11 supported, direct download no need to reset
- Arduino compatible works great with the latest Arduino IDE/Mongoose IoT/Micro python

BME280 Barometric Pressure Sensor:
- Model: GY-BMP280-3.3
- Chip: BMP280
- Power Supply: 3V/3.3V DC
- Peak Current: 1.12mA
- Air Pressure Range: 300-1100hPa (equivalent to +9000…-500m above sea level)
- Temperature Range: -40 … +85 °C
- Digital Interfaces: I²C (up to 3.4 MHz) and SPI (3 and 4 wire, up to 10 MHz)
- Current Consumption of Sensor BMP280: 2.7µA @ 1 Hz sampling rate
|
Pin No. |
Pin Name |
Pin Description |
|
1 |
VCC |
The power source of 3.3vdc |
|
2 |
GND |
Ground |
|
3 |
SCL |
Serial Clock |
|
4 |
SDA |
Serial Data |

LIBRARY REQUIRED
- ESP8266 WebServer - Click to open👈
- Wire - Click to open👈
- Adafruit sensor - Click to open👈
- Adafruit BMP280 - Click to open👈
After downloading these libraries
To install the libraries - Go to sketch -> Include library -> add .zip library
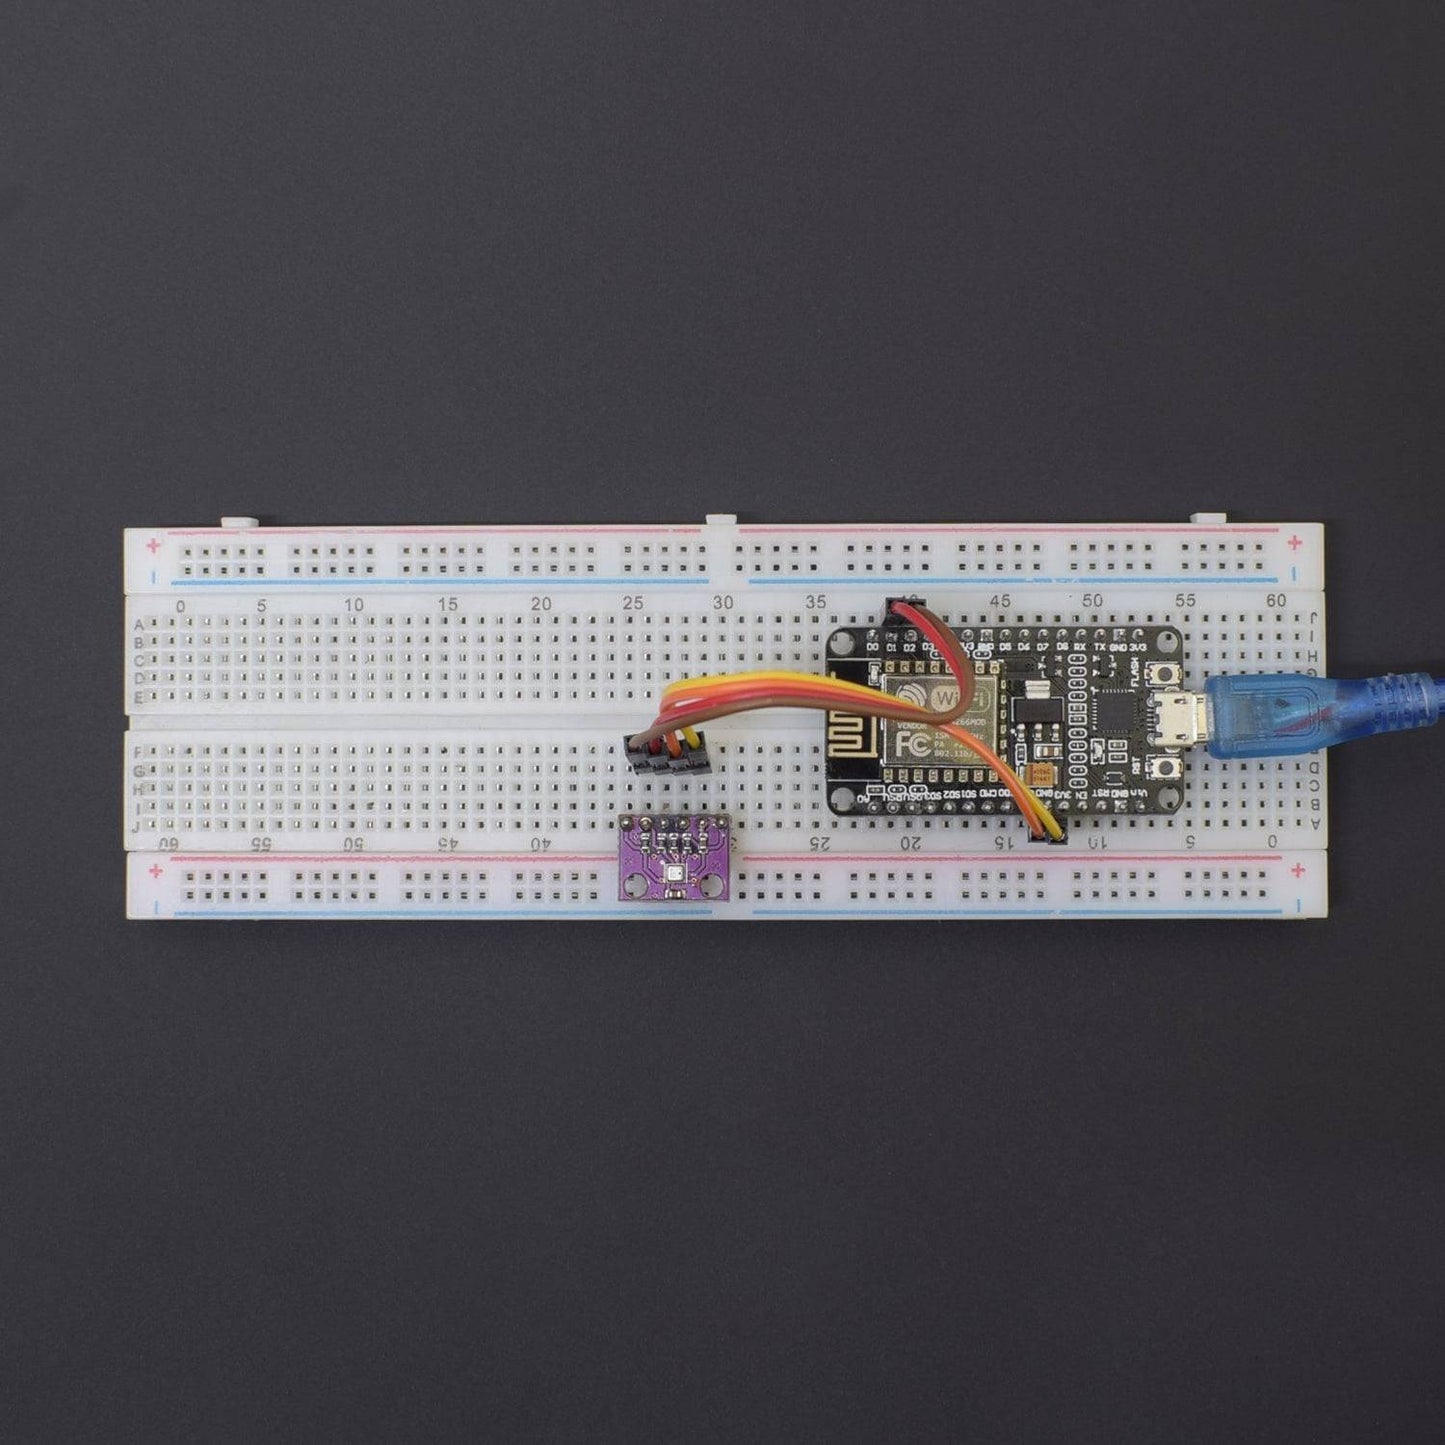
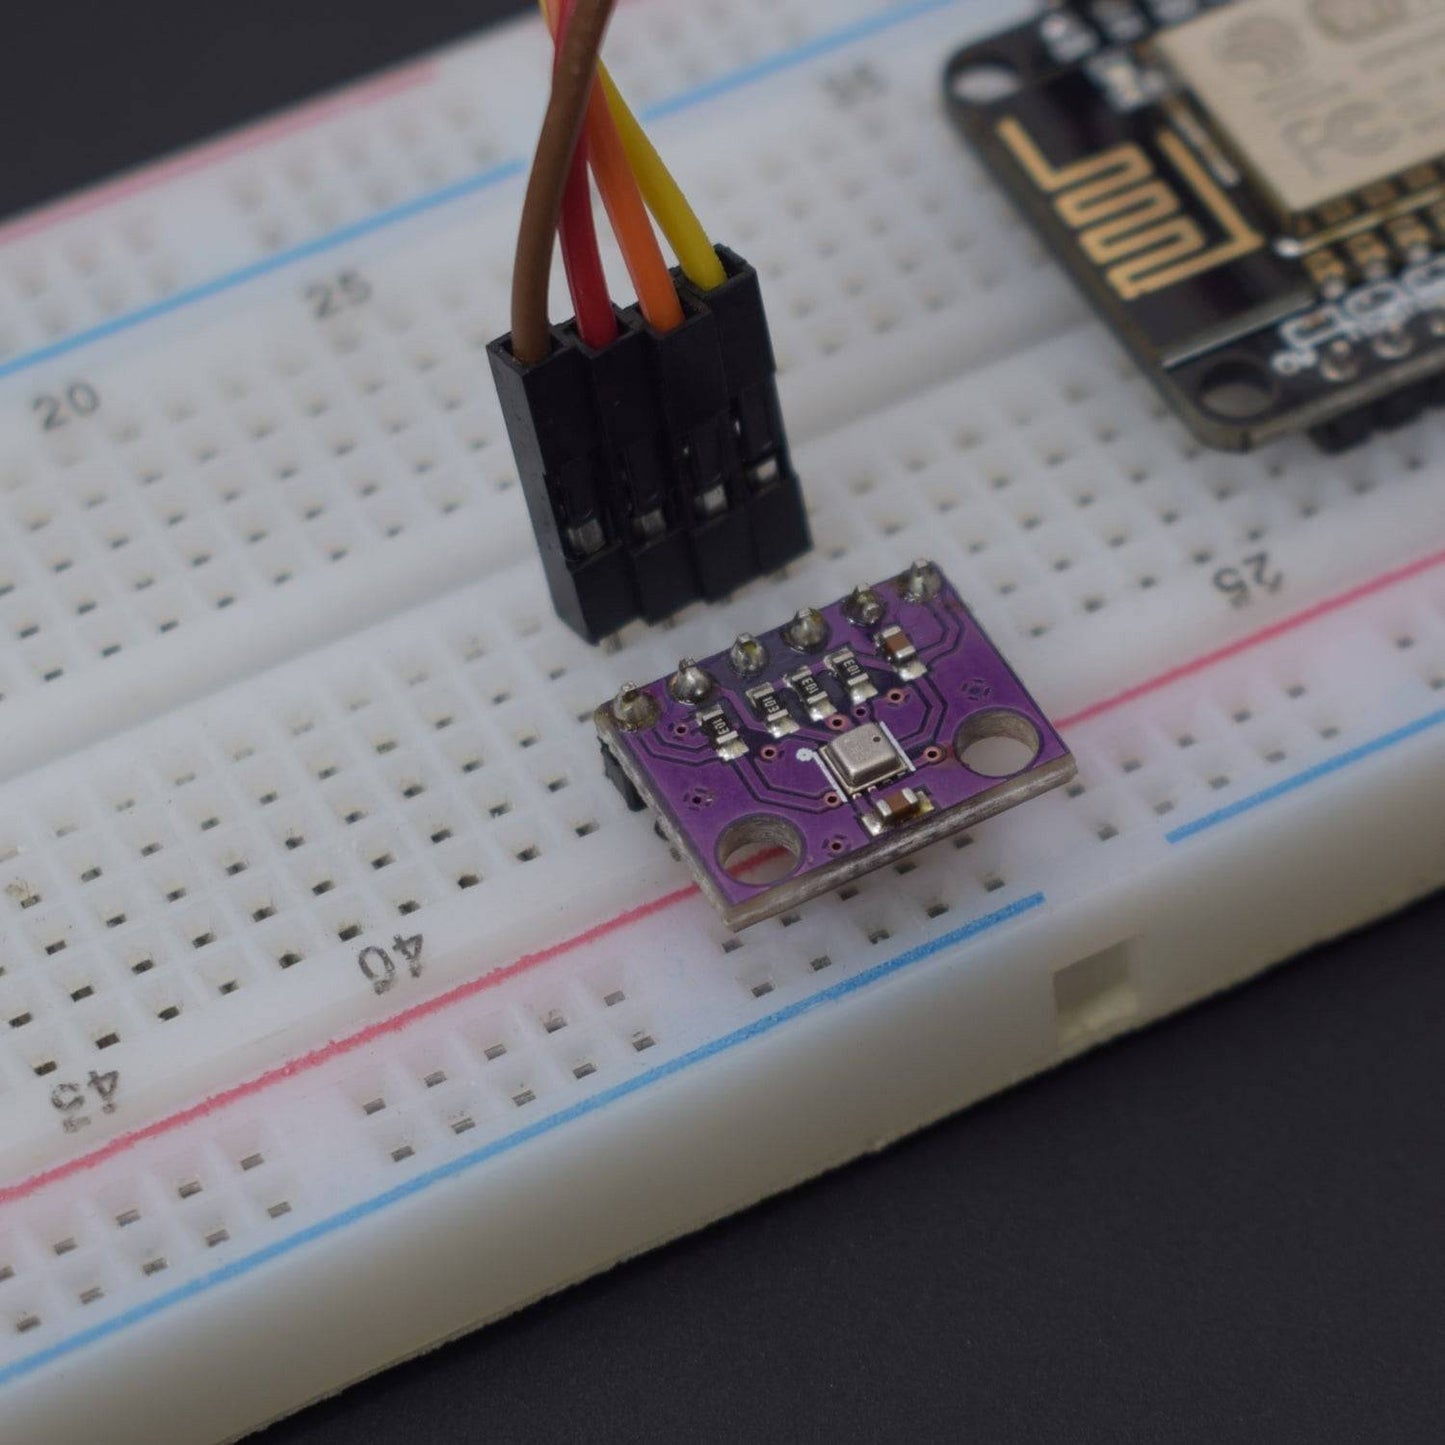
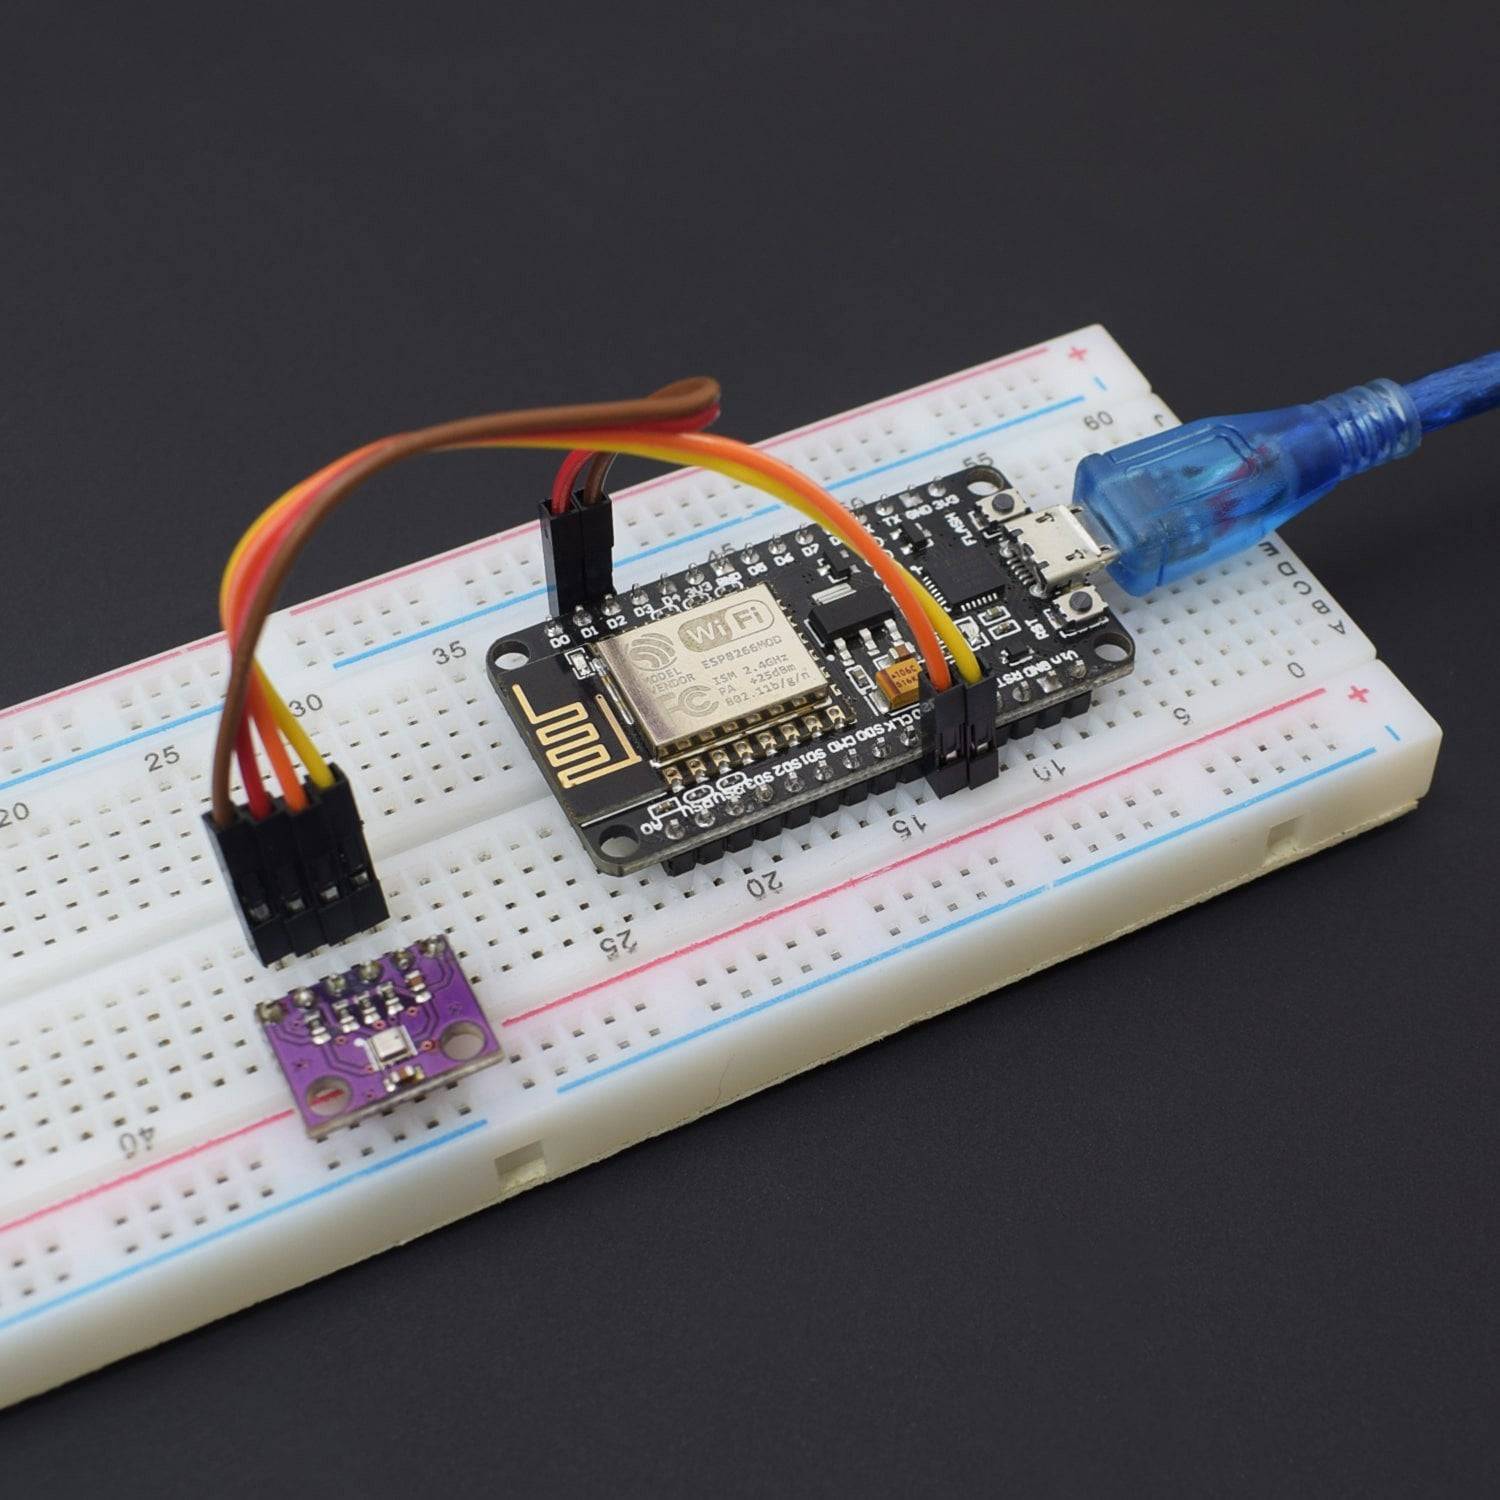
CIRCUIT CONNECTION
- Connect the BMP280 Module's “Vcc” pin to the Node MCU pin 3.3v.
- Connect the BMP280 Module's “Gnd” pin to the Node MCU pin GND.
- Connect the BMP280 Module's “SCL” pin to the Node MCU pin D1.
- Connect the BMP280 Module's “SDA” pin to the Node MCU pin D2.

CODE
WORKING AND OUTPUT
Welcome to the Node MCU-Based project.
- First, upload the code. Enter your “SSID and password”.
- After uploading the code, open the serial monitor you will get the Server IP.
- Copy the IP and paste it into the browser.
- After uploading the code, open the serial monitor at a baud rate of 115200.
- If everything is ok, it will output the dynamic IP address obtained from your router and show the HTTP server started message.
- Next, load up a browser and point it to the IP address shown on the serial monitor. The ESP8266 should serve up a web page showing temperature, humidity, pressure, and altitude from BME280